Set up shipping zones and rates
Shipping settings control where your store ships, which rates customers see at checkout, and how orders are fulfilled. Store owners set up shipping in their dashboard. In a marketplace, admins set marketplace-wide controls, and vendors create their own profiles and rates in their dashboard.
Turn on shipping and choose where you ship
Section titled “Turn on shipping and choose where you ship”- Go to Settings → Shipping.
- In the Shipping section, turn on the enable toggle. The toggle shows Enabled or Disabled. While shipping is disabled, the section reads “Enable shipping to configure locations.”
- Open the Shipping to dropdown and choose one of these options:
- Only these countries ships only to the countries you select.
- Everywhere except these countries ships to every country except the ones you select.
- Anywhere in the world ships to any country.
- If you chose a country option, select countries in the Ship only to these countries field, then click Save.
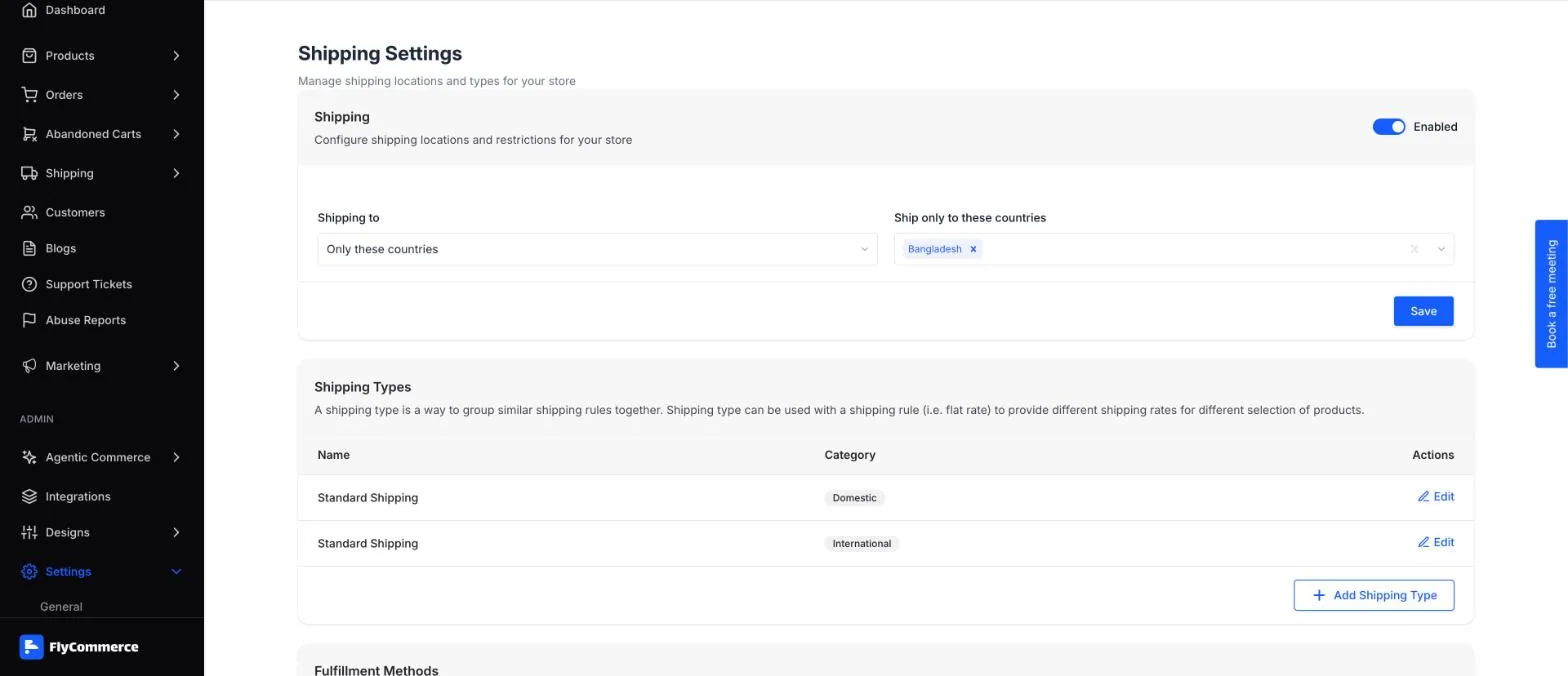
Shipping is enabled, and Shipping to is set to Only these countries.
Shipping types
Section titled “Shipping types”A shipping type groups similar shipping rules together. Pair a shipping type with a rule, such as a flat rate, to charge different rates for different selections of products.
The Shipping Types table lists each type with its Name, Category, and Actions (Edit). The table includes two defaults: Standard Shipping (Domestic) and Standard Shipping (International). To create another type, click Add Shipping Type.
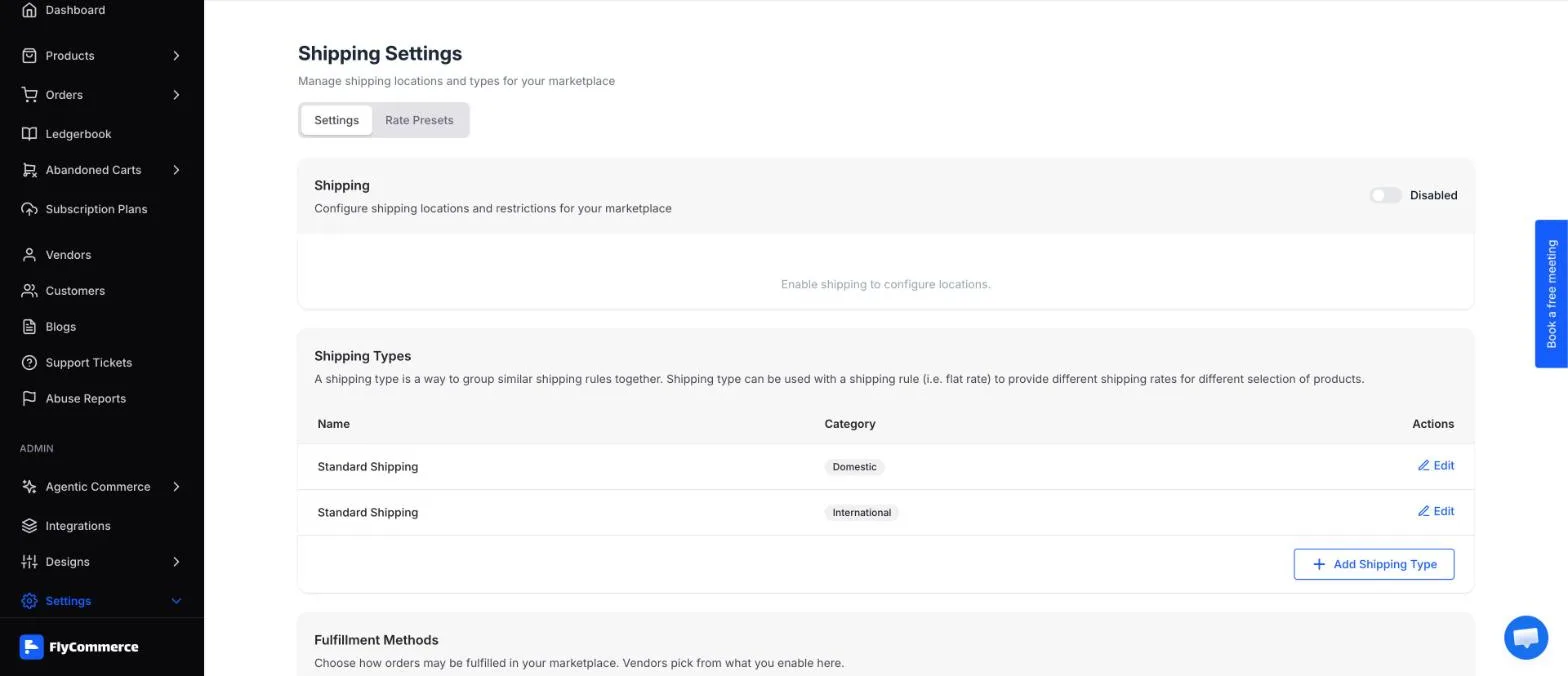
The marketplace Shipping Settings page lists shipping types in the Shipping Types table.
Create shipping profiles and rates
Section titled “Create shipping profiles and rates”A shipping profile sets the location a product ships from, its handling time, and its rates. Store owners manage profiles under Shipping → Profiles. Vendors use the same screens in their own dashboard.
Create a profile
Section titled “Create a profile”- Go to Shipping → Profiles and click Create New Profile. The list shows each profile’s PROFILE NAME, RULES, CATEGORIES, HANDLING TIME, and ACTIONS.
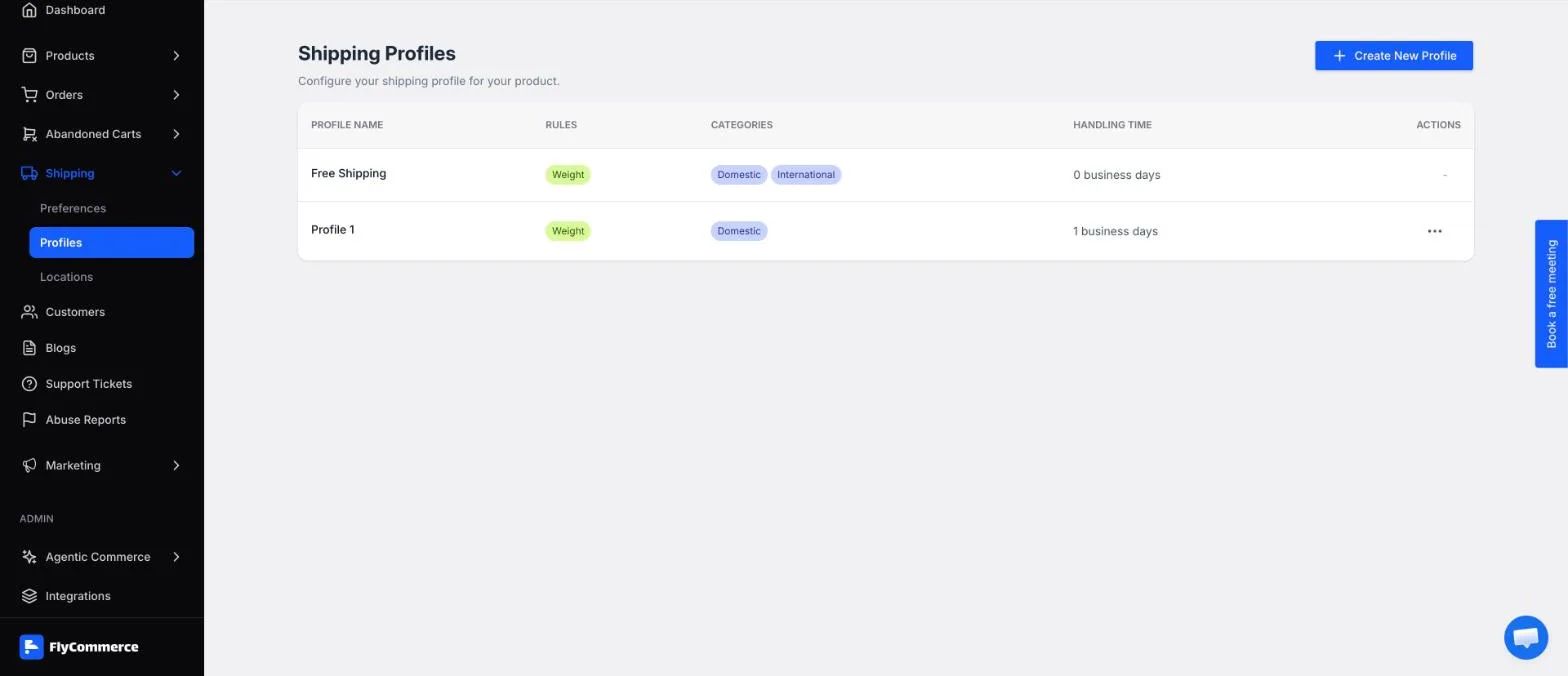
The Shipping Profiles list shows each profile’s rules and handling time.
- Enter a Profile Name.
- In Ship From, select a location address. If the address you need isn’t listed, use the “To create a new address click here” link.
- Set the Handling Time, which is the number of days you need to process and hand over goods for shipment.
- In Rates, domestic and international rates appear in separate groups. Each rate has Edit and Delete actions.
- Click Save Changes.
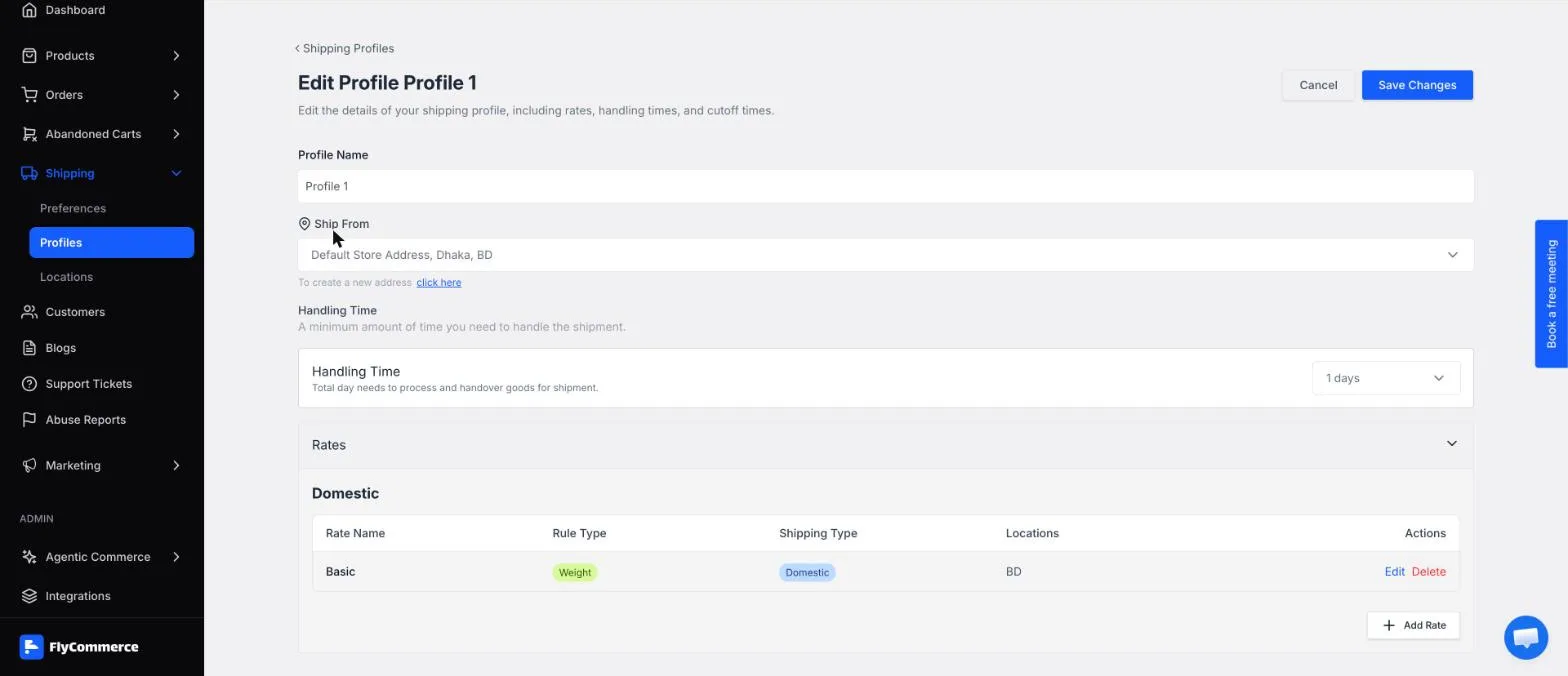
The profile form includes the ship-from location, handling time, and rates.
Add a rate
Section titled “Add a rate”- In the profile, click Add Rate and choose a Shipping Type, such as Standard Shipping - domestic.
- Under Shipping Regions and ZIP Codes, click Select Regions. The Select Countries picker groups countries by continent. Expand a country to choose its states.
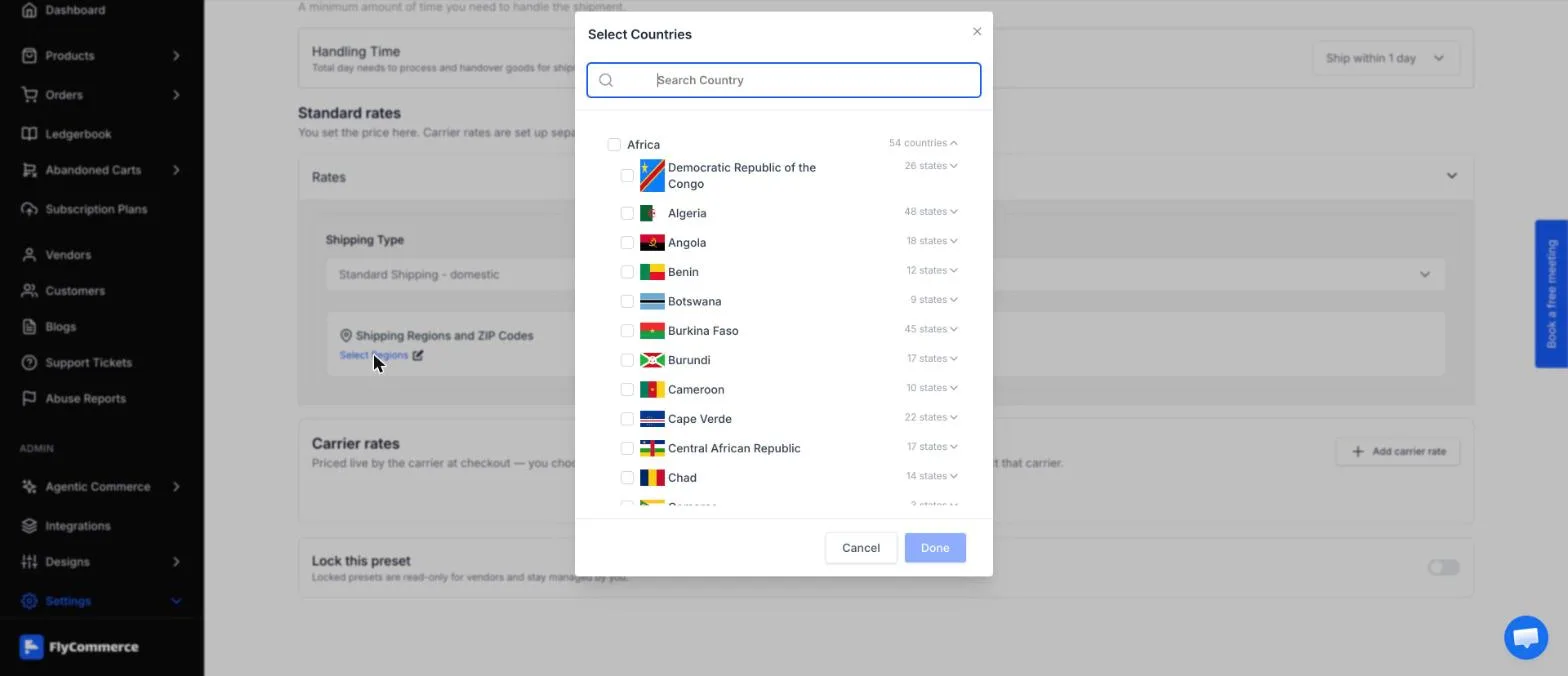
The Select Countries picker groups countries by continent.
- Optionally, under ZIP Codes (Optional), keep the mode select set to Include ZIP Codes, then enter ZIP codes separated by commas. Leave the box empty to apply the rate to all.
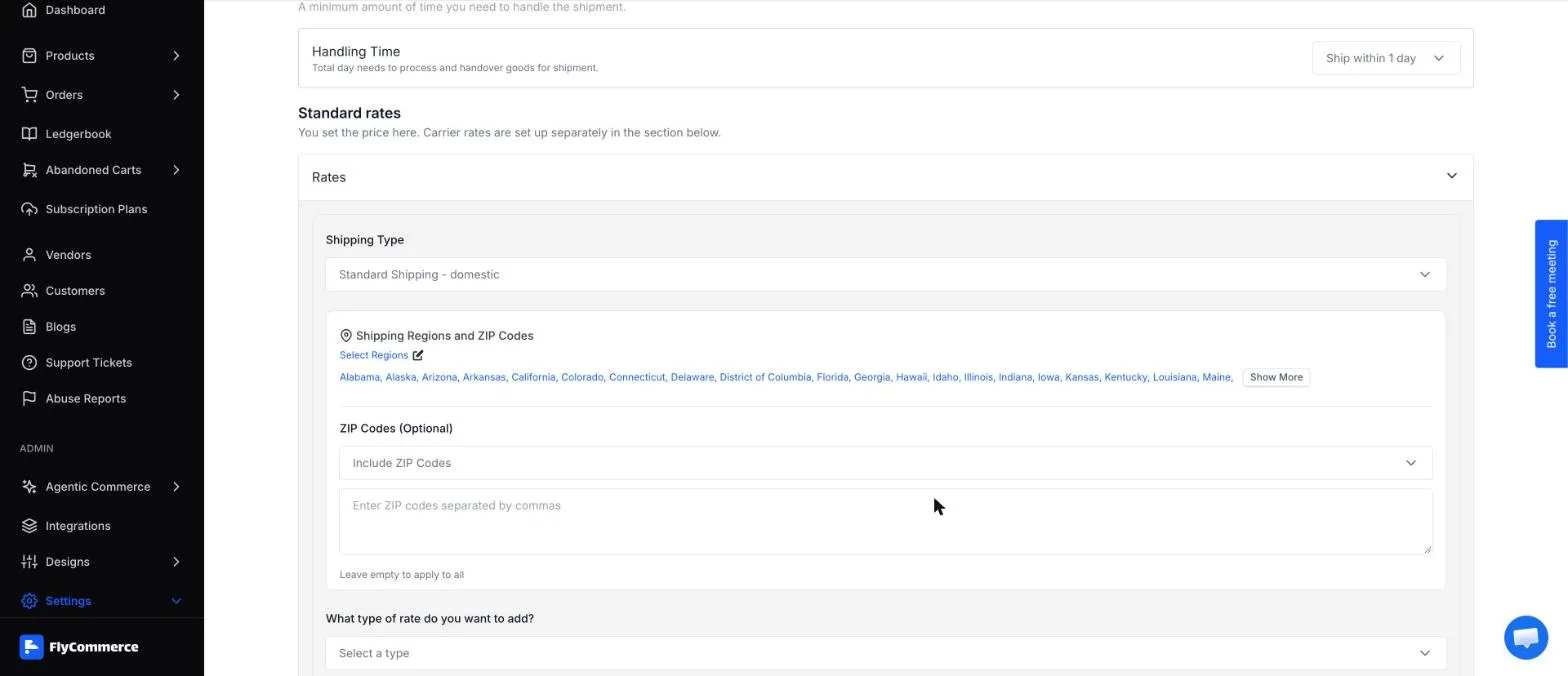
Choose regions, then optionally limit the rate to specific ZIP codes.
- Under What type of rate do you want to add?, choose Weight Based Rate, Price Based Rate, or Flat Rate. Then complete the fields for that type:
- Flat Rate: Enter a Rate Name, Transit Time, Flat Rate Cost, and Handling Fee. Transit Time and Flat Rate Cost are required. To offer free shipping above an order amount, select Offer free shipping when a customer buys over a certain amount. Click Add to save or Cancel to discard.
- Weight Based Rate: Enter a Rate Name, Transit Time (for example, 2 - 3 days), Cost On (for example, Item), Handling Fee, Starting Weight, Ending Weight, and Shipping Cost. Shipping Cost is required. For free shipping, select the same checkbox and enter a Minimum Order Amount. Click Update or Cancel.
- Price Based Rate: Add tiers by order price. Each tier has a starting price, an ending price, and a shipping cost.
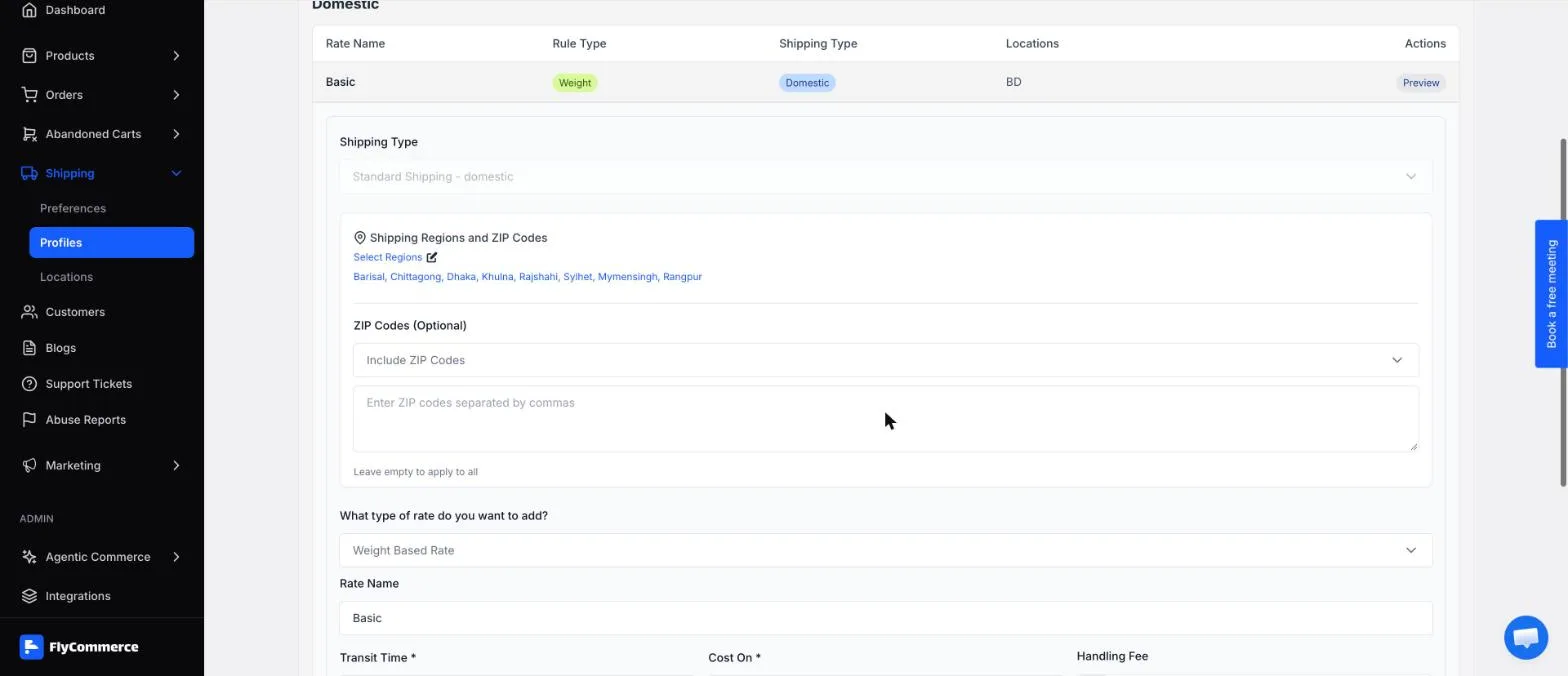
The rate form shows the fields for the rate type you select.
Use the Preview action on any rate row to view it.
If a profile has both price-based and weight-based rates, checkout shows them separately and adds them together. For example, an order of $80 that weighs 50 kg falls in a price tier of $0–$100 that costs $1, and a weight tier of 0–100 kg that costs $5. The customer pays $6 in shipping.
Set preferences and locations
Section titled “Set preferences and locations”- Go to Shipping → Preferences.
- Set the Weight Unit and Dimension Unit to the units you use for product weights and sizes. For example, kg and cm.
- Set the Cutoff Time. If a customer places an order before the cutoff time, processing starts that day. Otherwise, processing starts the next day. Customers see this cutoff time.
- Click Save.
In a marketplace, your marketplace sets how orders are fulfilled. Under Fulfillment Services, turn on Auto-push orders to courier to send each order to the courier selected at checkout when it enters processing, with no manual Create Shipment step. Use Multi-Carrier Providers to connect a multi-carrier shipping provider.
Set marketplace controls
Section titled “Set marketplace controls”Marketplace admins set these controls on Settings → Shipping. Vendors keep their own rates and locations either way.
-
Under Fulfillment Methods, choose how orders can be fulfilled. Vendors pick from the methods you enable here:
- Third-party couriers: vendors push orders to a connected courier or aggregator.
- Manual: vendors arrange delivery themselves, and nothing is dispatched automatically.
Choose a Default for new vendors, then click Save.
-
Under Vendor Shipping Controls, turn the Vendors can connect their own carrier accounts toggle on or off. When it’s on, each vendor connects to and is billed by their own carrier account. Turn it off if the marketplace holds the carrier relationships. Use the See available carriers link to review the carriers.
-
Under Handling Fee, enter the Fee and choose how it’s Charged as, such as a fixed amount. When no marketplace fee is set, the section reads “No marketplace fee. Vendors set their own handling fee on each shipping rate.”
-
Under Refund Shipping, decide who bears the shipping cost when an order is refunded. Select Customer to make shipping non-refundable. The customer bears the cost, and it is never returned on a refund.
Create a rate preset
Section titled “Create a rate preset”Rate presets are shipping setups that vendors can adopt with one click. Lock a preset to keep it managed by you.
- Go to Settings → Shipping → Rate Presets. The table shows each preset’s NAME, RULES, STATUS, USED BY, and ACTIONS.
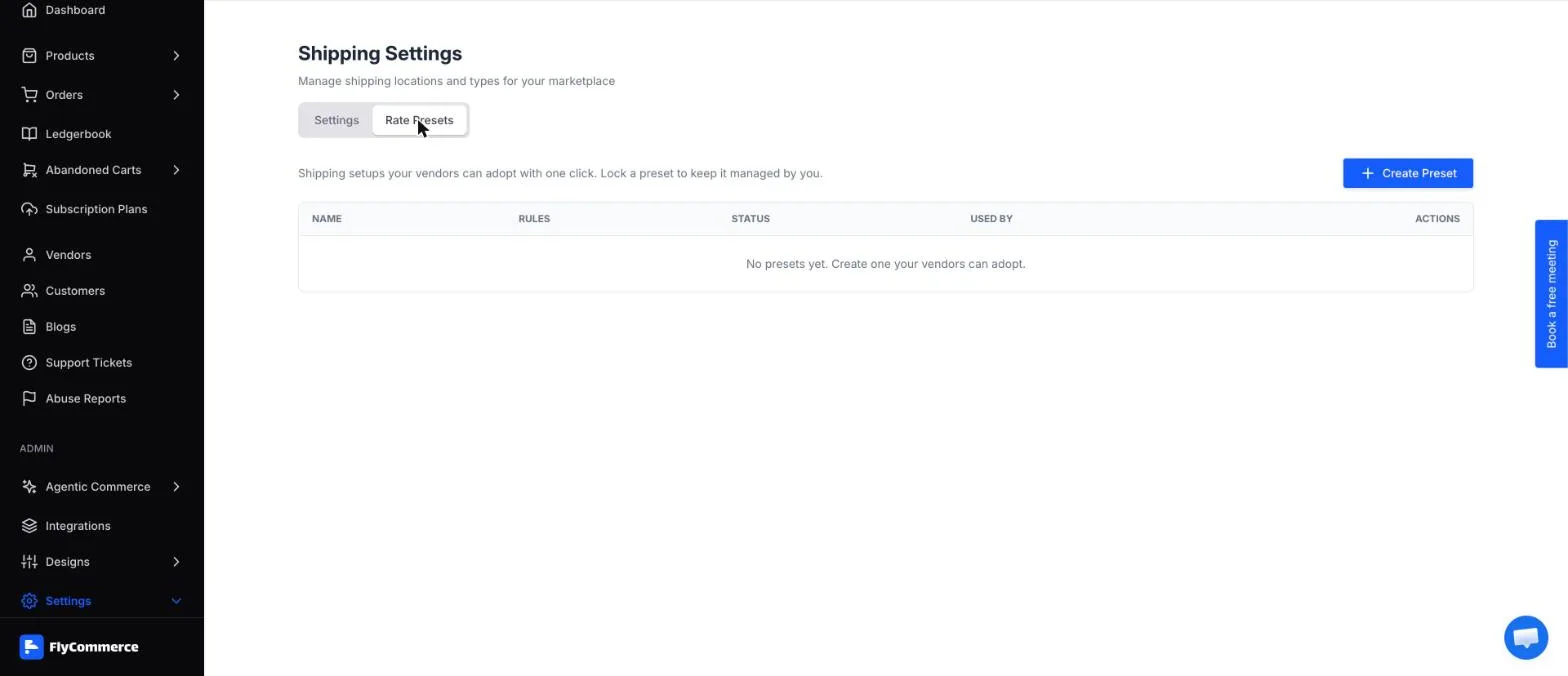
The Rate Presets tab lists each preset, its status, and where it is used.
- Click Create Preset.
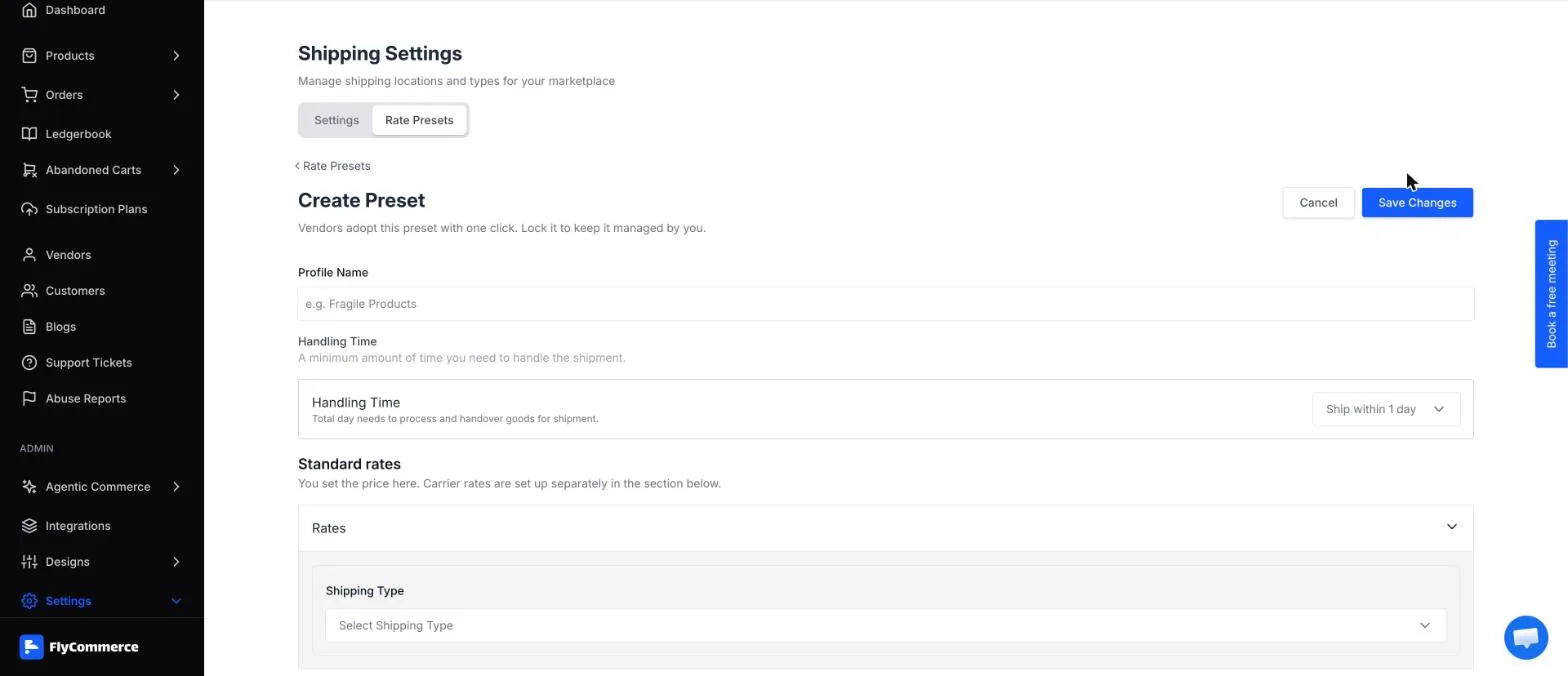
The Create Preset form combines standard rates, carrier rates, and a lock option.
- Enter a Profile Name and a Handling Time, such as Ship within 1 day.
- Under Standard rates, you set the price. Choose a Shipping Type, set Shipping Regions and ZIP Codes, and enter the rate. Carrier rates are set up separately, in the section below.
- Under Carrier rates, click Add carrier rate. The carrier prices the rate live at checkout, based on the carriers and handling fee you choose. The rate applies to each vendor once they connect that carrier.
- To keep the preset managed by you, turn on Lock this preset. Locked presets are read-only for vendors.
- Click Save Changes.
Check your setup at checkout
Section titled “Check your setup at checkout”After you change shipping settings, profiles, or rate presets, test the result as a customer would. Running this check after each change catches mistakes before customers do.
- Add a test product that uses the profile you want to check.
- Open your storefront, add the product to the cart, and go to checkout.
- Enter an address inside your shipping regions. Confirm that the expected rate, free-shipping threshold, and handling fee appear.
- Enter an address outside your Shipping to countries. Confirm that no rate can be selected.