Understand the customer checkout flow
This guide walks through the path a shopper takes from a product page to a completed payment on your FlyCommerce store. Store owners and marketplace admins can use it to test the storefront and explain the steps to customers.
Add a product to the cart
Section titled “Add a product to the cart”- Open a product page. Check the price, the stock badge, and the Sold by line that names the vendor.
- Choose a Quantity.
- Click Add to Cart. On a pre-order product, the button reads Pre-order, and the page shows the ship date and any deposit information.
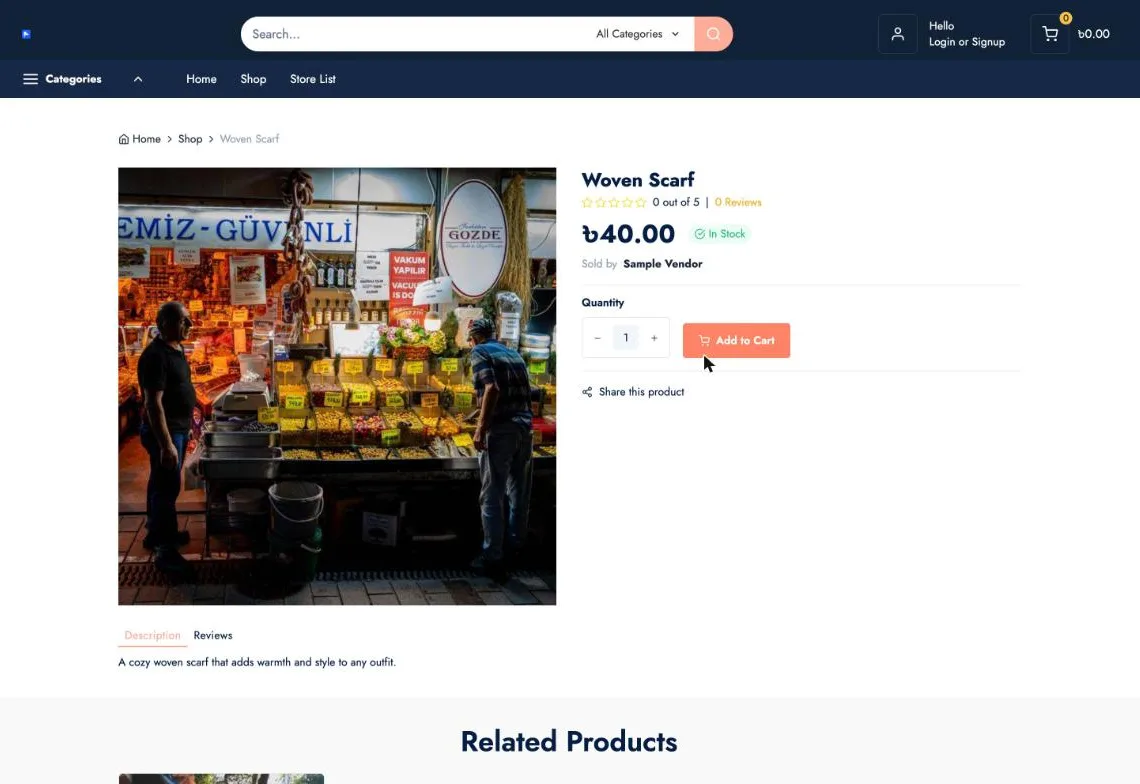
A product page shows the price, stock status, vendor, and Add to Cart button.
Review the cart
Section titled “Review the cart”- Open the cart. Items are grouped under the name of each vendor.
- Change a quantity with the - and + controls, or remove an item with the trash icon.
- If the shopper has a coupon, apply it in the Cart Summary.
- Click Proceed to Checkout.
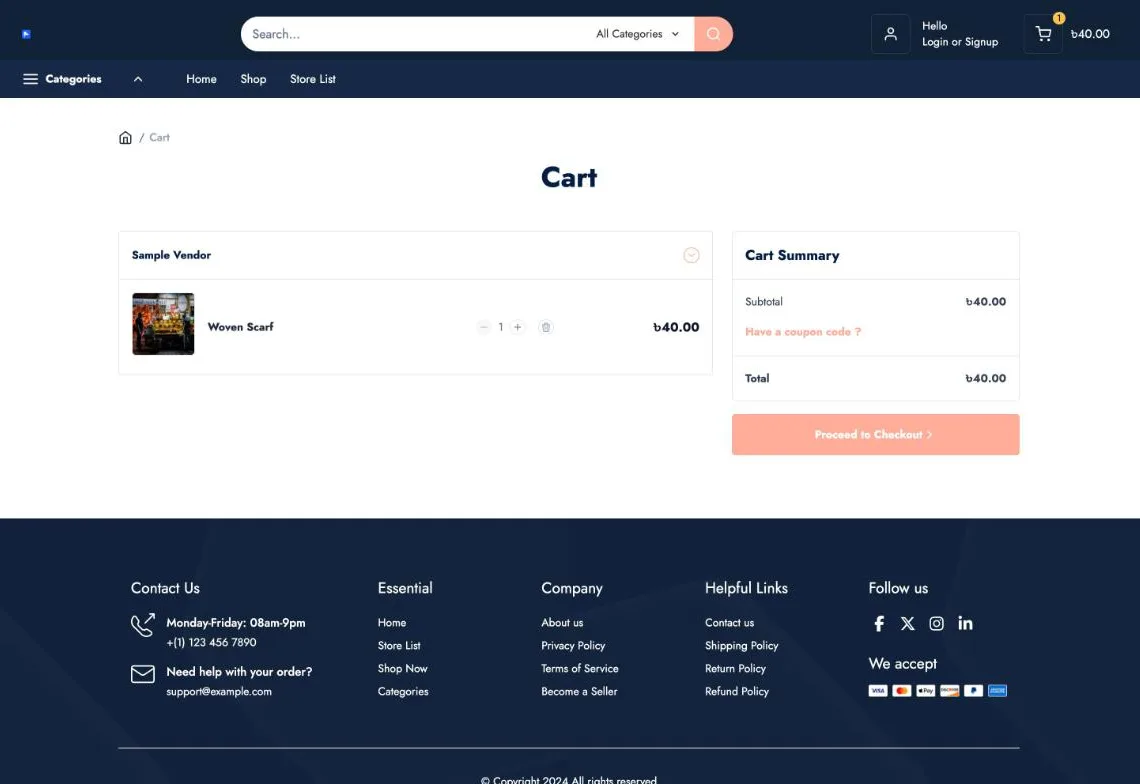
The cart groups items by vendor and shows the Cart Summary with the subtotal and total.
Enter contact information
Section titled “Enter contact information”Checkout opens on its own page with your store logo and a Return to Cart link. The first step is Contact information.
- Enter an Email address. This field is required.
- Optionally, select Email me with news and offers if the shopper wants marketing emails.
- Click Continue as Guest. If the shopper already has an account, choose Log In instead.
Guest checkout is controlled by Allow Guest Checkout in Settings → Checkout.
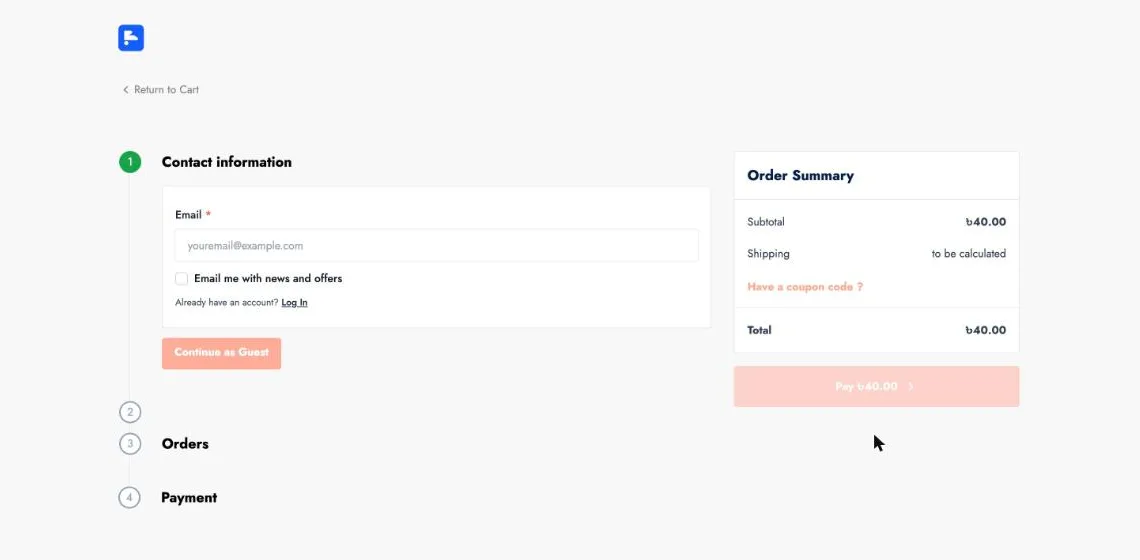
Checkout shows the numbered steps and the Order Summary.
Enter the address and shipping details
Section titled “Enter the address and shipping details”- Complete the address and shipping step, which is step 2 of checkout. Which address fields appear depends on the Default Fields set in Settings → Checkout, including Company Name Field, Address Line 2 Field, and Phone Number Field.
- Check the Order Summary. Shipping shows “to be calculated” until the shipping cost is determined.
For shipping setup, see Set up shipping zones and rates.
Review the order and pay
Section titled “Review the order and pay”- Check the Orders step to review the items in the order.
- On the Payment step, choose a payment method. The options depend on what you have turned on in Settings → Payment, such as Cash on Delivery or Bank Deposit.
- Click Pay. The button shows the order total.
The Shipping Policy and Refund Policy links appear in the checkout footer.
After payment
Section titled “After payment”When payment succeeds, the order is placed. If the Order Placed email is enabled under Settings → Notification, the customer receives an order confirmation email.
If a payment fails, the order doesn’t complete.