Customize the checkout page
The checkout page is where customers enter their contact details, address, and payment. FlyCommerce has no checkout template in the page builder, so you control it through settings: Settings → Checkout, Settings → Payment, Settings → Shipping, and Settings → Tax. Store owners and marketplace admins make these changes.
Review the checkout flow
Section titled “Review the checkout flow”Customers move through four steps:
- Contact information, where they enter an email address. They can select Continue as Guest or Log In.
- Address details.
- Orders, where they review the items.
- Payment, where they select the Pay button, which shows the order amount.
The Order Summary on the right shows the Subtotal, shipping (shown as “to be calculated”), a “Have a coupon code ?” field, and the Total. The footer links to the Shipping Policy and Refund Policy.
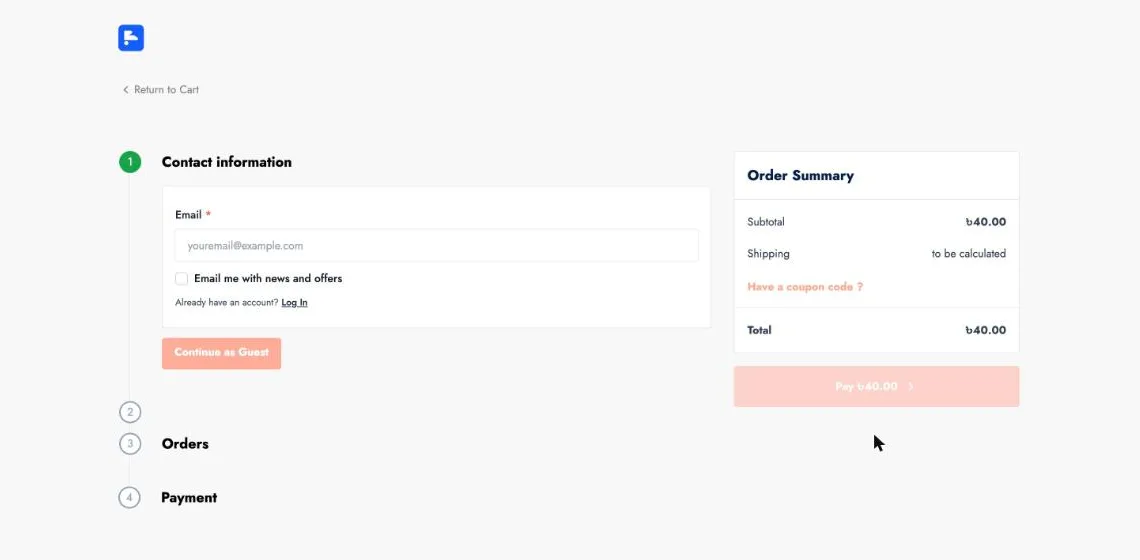
The checkout page shows the contact step and an Order Summary with the Pay button.
Set guest checkout and form fields
Section titled “Set guest checkout and form fields”- Go to Settings → Checkout.
- Turn Allow Guest Checkout on or off. This toggle controls whether customers can check out without creating an account.
- Under Default Fields, set each field:
- Full Name Field: First and Last Name or Last Name Only.
- Company Name Field, Address Line 2 Field, and Phone Number Field: Hide, Optional, or Required.
- To collect more information, select Add Custom Field under Custom Fields.
- Select Save.
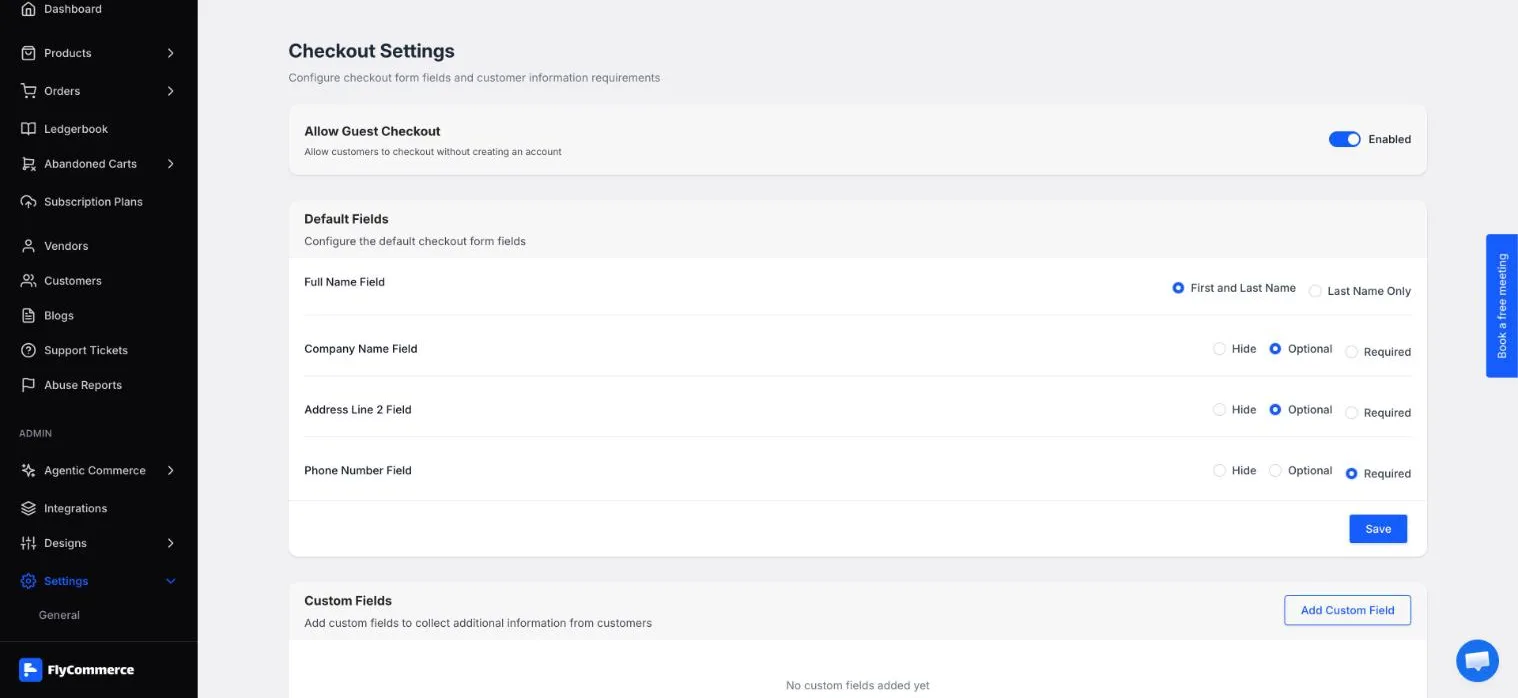
Checkout settings control guest checkout, default fields, contact method, and marketing options.
Choose the contact method for updates
Section titled “Choose the contact method for updates”Under Customer Contact Method, choose how customers receive order and shipping notifications:
- Phone number or email: Customers enter a phone number or an email address.
- Email: Customers enter an email address.
SMS updates require an SMS gateway.
Under Marketing Options, turn on Email or SMS to show a checkbox that lets customers sign up for marketing messages in that channel.
Connect payment methods
Section titled “Connect payment methods”Customers can complete checkout only after at least one payment method is connected. Go to Settings → Payment.
- Credit Card: Connect Stripe through Connect. The Test Gateway is listed as Disabled and uses card number 4242 4242 4242 4242 for testing. Turn it on only in test setups.
- Alternative Payment Methods: Connect other gateways from this list. For setup steps, see Stripe and PayPal.
- Manual Payments: Offer Cash on Delivery or Bank Deposit. For Bank Deposit, open Bank Settings, set Bank Checkout to Enabled, and enter a Title, a Description, Available Countries, and the Account Information.
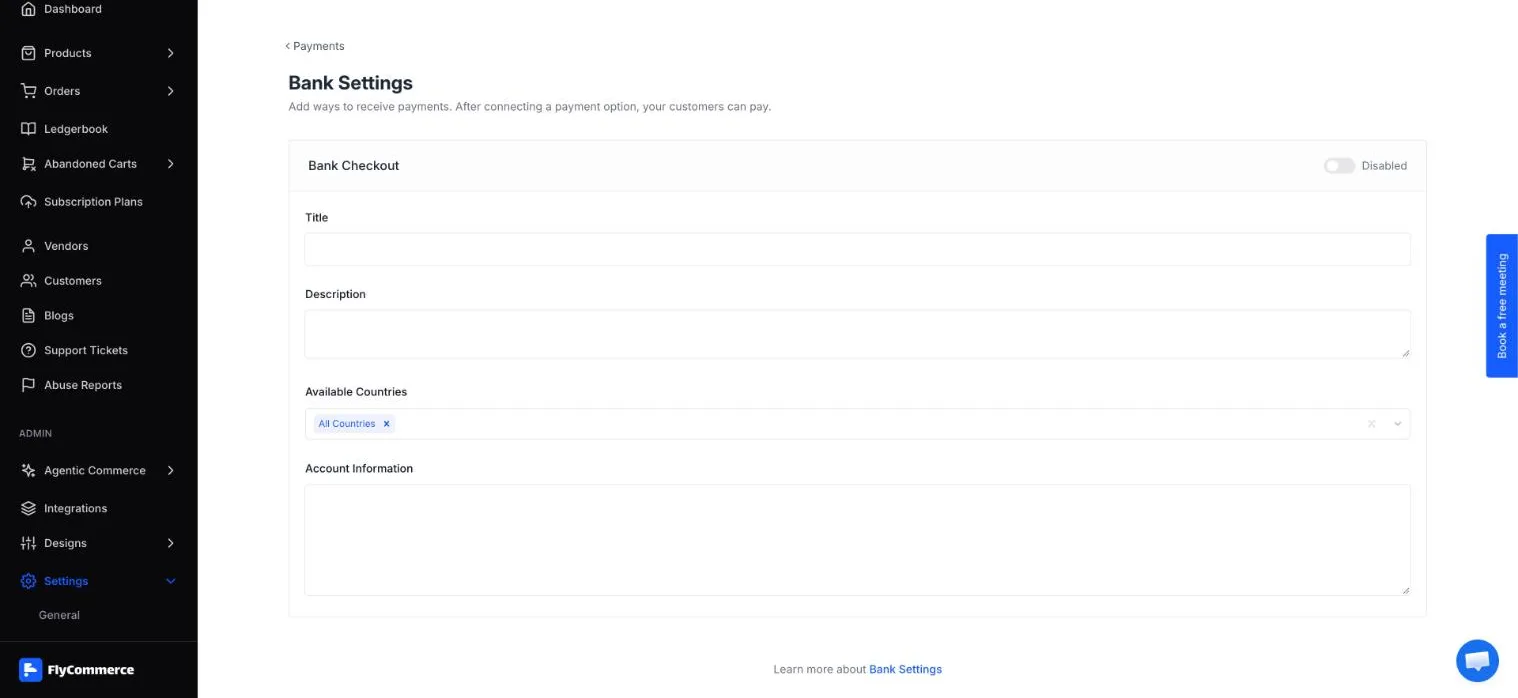
Bank Settings controls the Bank Deposit method, including its title, description, and account information.
Set shipping and tax
Section titled “Set shipping and tax”Shipping and tax are configured outside the checkout page.
- In Settings → Shipping, choose the countries you ship to under Shipping to, then set up your rates. For details, see Set up shipping zones and rates.
- In Settings → Tax, configure your tax rules. For details, see Configure tax settings.
- On each product, Collect Tax on this product controls whether tax applies to that item.
Set policy links
Section titled “Set policy links”The Shipping Policy and Refund Policy links in the checkout footer point to your policy pages. For the policy text and settings, see Store policy settings.