Manage orders as a vendor
FlyCommerce splits a marketplace order by vendor, so you handle only the items you sell. As a vendor, you use the order list to filter orders, charge and accept them, create shipments, issue refunds, and print packing slips and invoices.
How marketplace orders are split
Section titled “How marketplace orders are split”A customer can buy from several vendors in one visit. The cart groups items under each vendor’s name, and each vendor fulfills the items it sells.
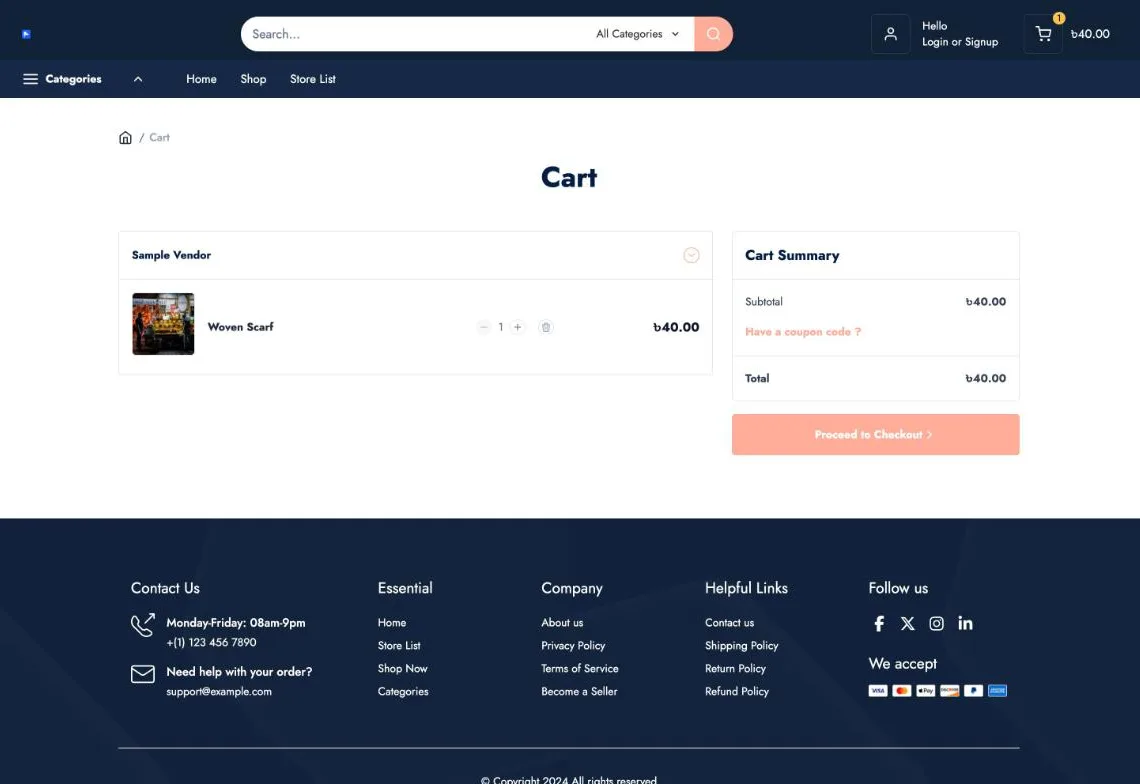
The storefront cart groups items by vendor. You fulfill only the items listed under your store.
Administrators see marketplace orders on the Orders → All Orders page of the admin dashboard. For that view, see Manage orders as an admin.
Find and open an order
Section titled “Find and open an order”- Sign in to the FlyCommerce vendor dashboard.
- Go to Orders → All Orders.
- Filter the list by status: Completed, Processing, Pending, Failed, Canceled, or Refunded.
- Open an order to view its details.
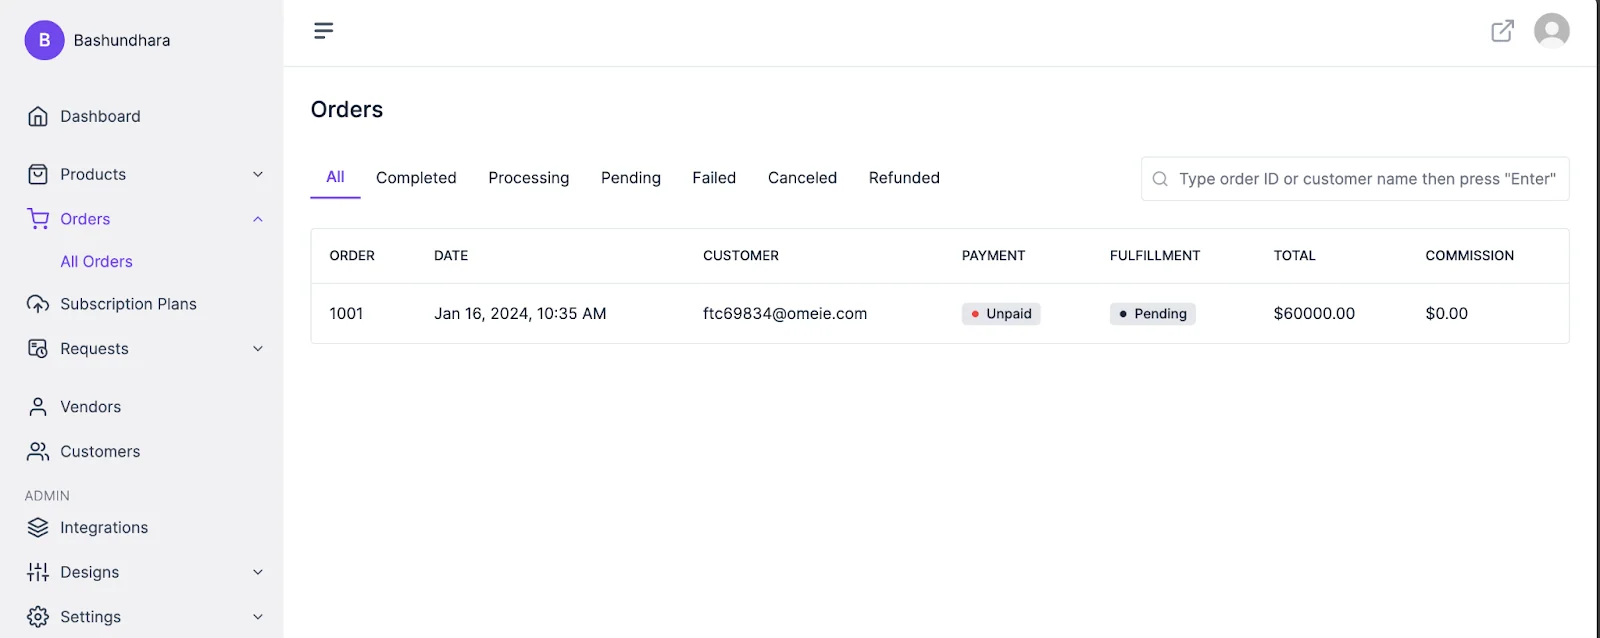
The order list filters orders by status.
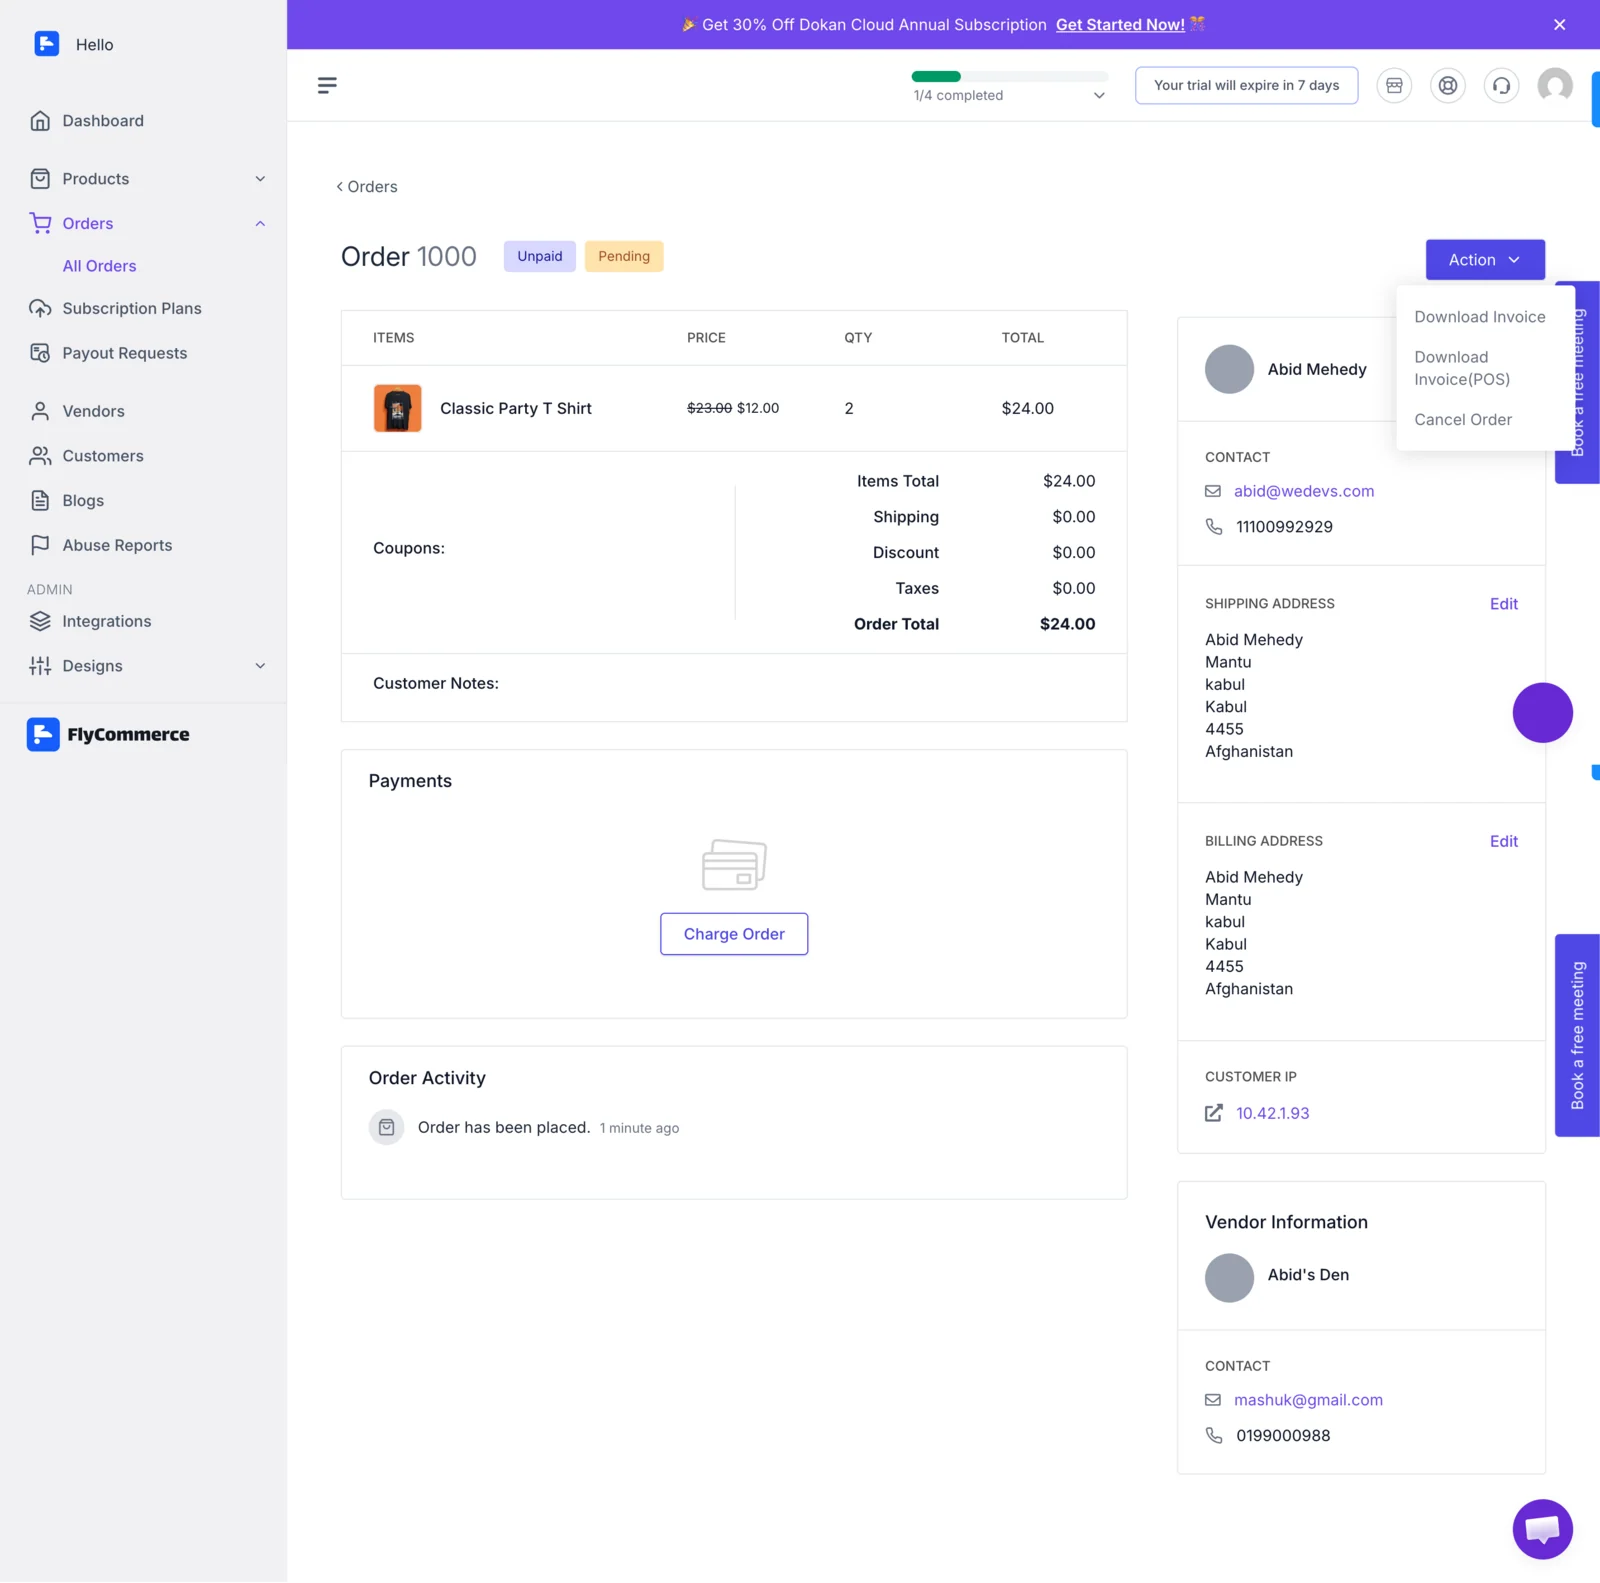
The order details page includes the Action button for holding, canceling, or deleting an order.
From the Action button, you can put the order on hold, cancel the order, or delete it. Check the order details before you choose one of these actions.
Charge and accept an order
Section titled “Charge and accept an order”To accept an order, charge it.
- Open the order and click Charge Order.
- In the window that opens, choose a payment method.
- Click Charge “X” amount, where X is the order total.
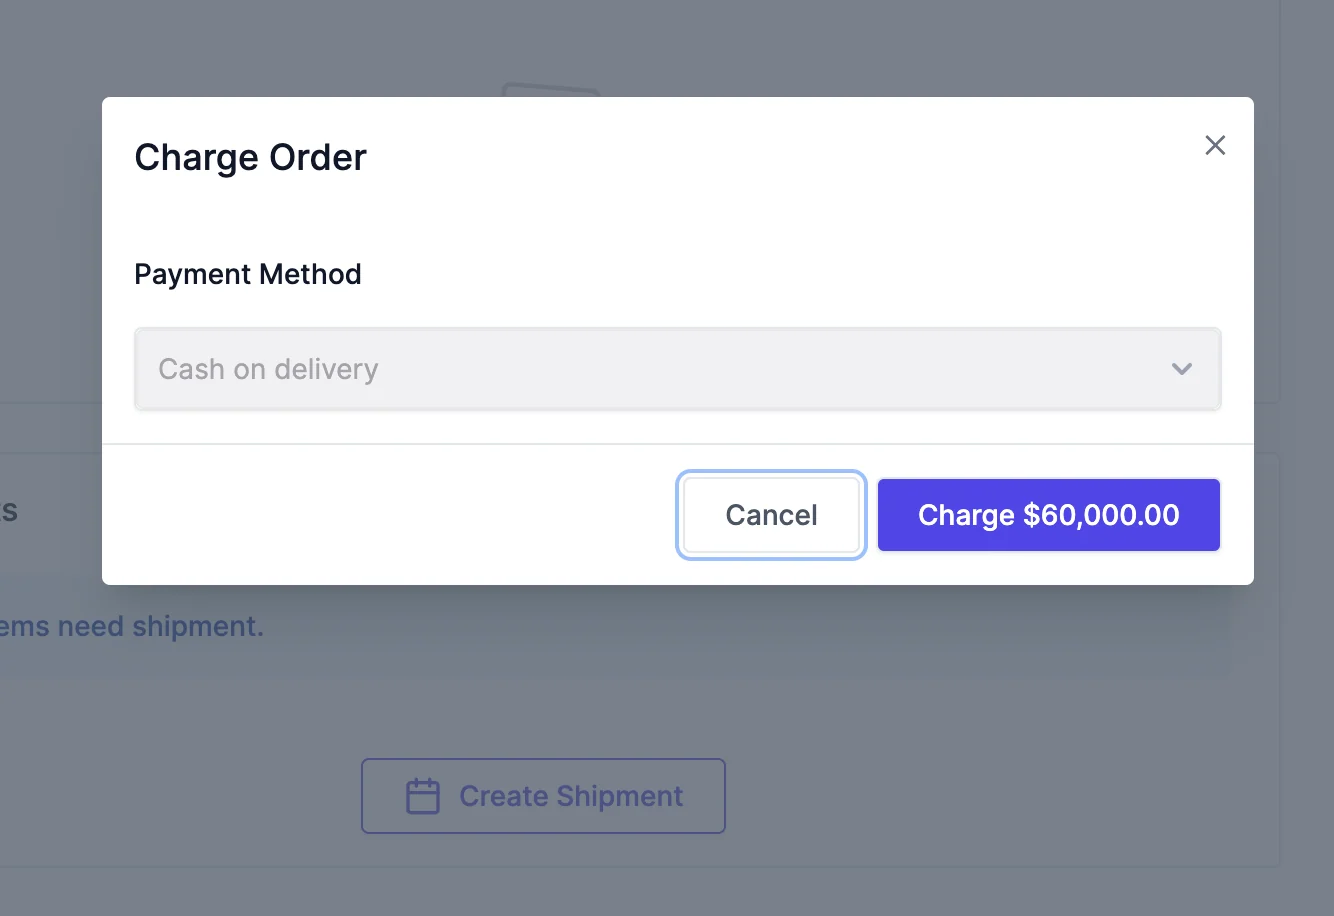
Choose a payment method, then charge the order to accept it.
After the charge, the order is accepted and its transaction details are shown.
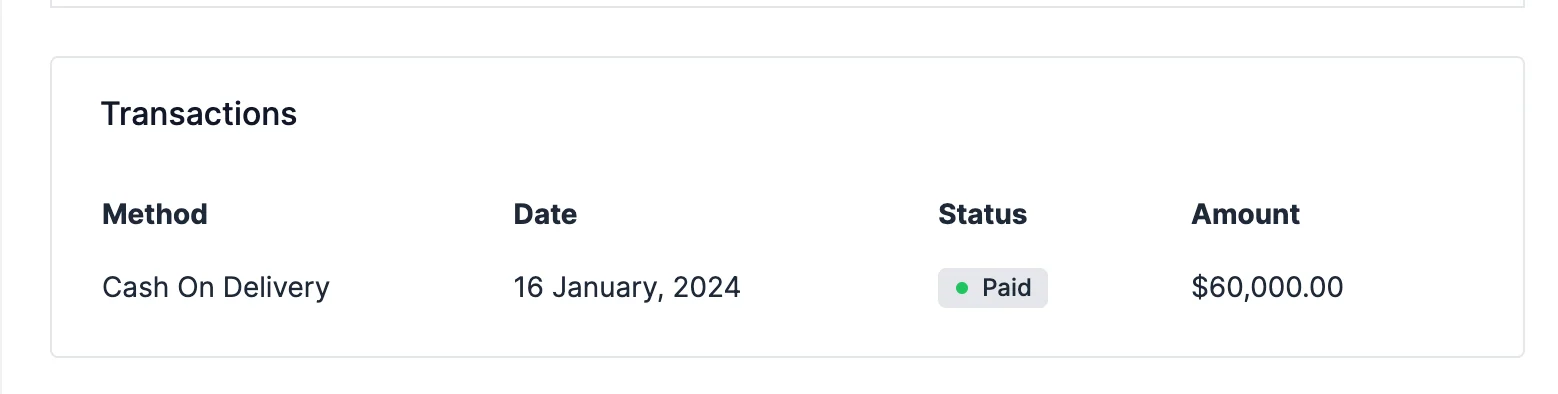
After the charge, the order is accepted and its transaction details appear.
Create shipments
Section titled “Create shipments”After you accept an order, create shipments for its items. Each shipment records the quantity, shipping status, carrier, and tracking number.
- Open the accepted order and click Create Shipment.
- In the window that opens, choose the number of products to ship, the shipping status, the shipment carrier, and the tracking number.
- Click Done.
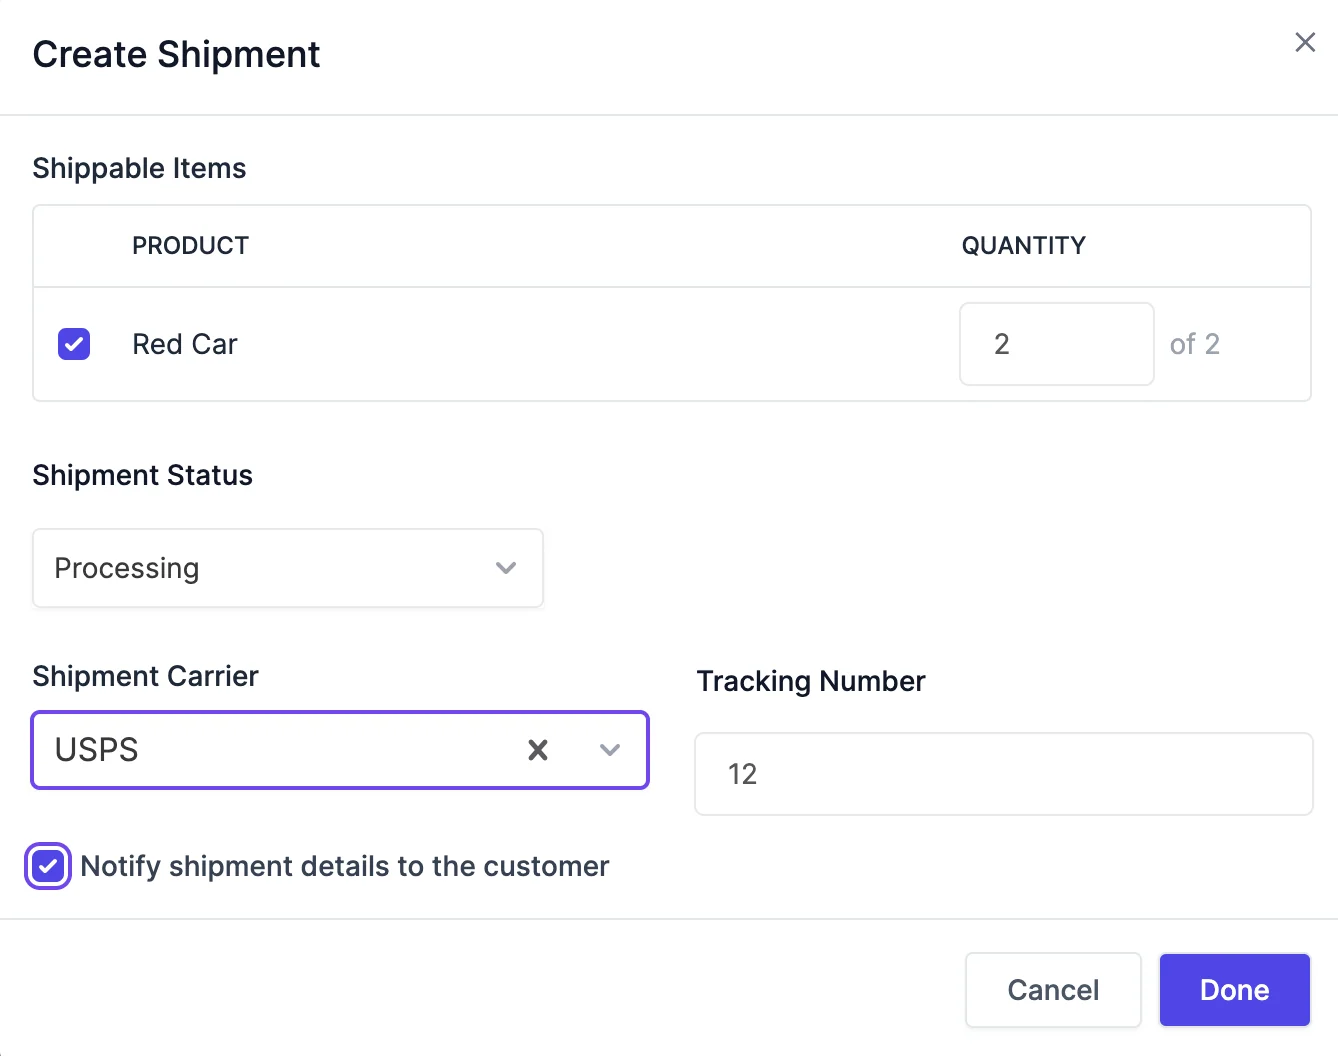
The Create Shipment window records what ships, its status, the carrier, and the tracking number.
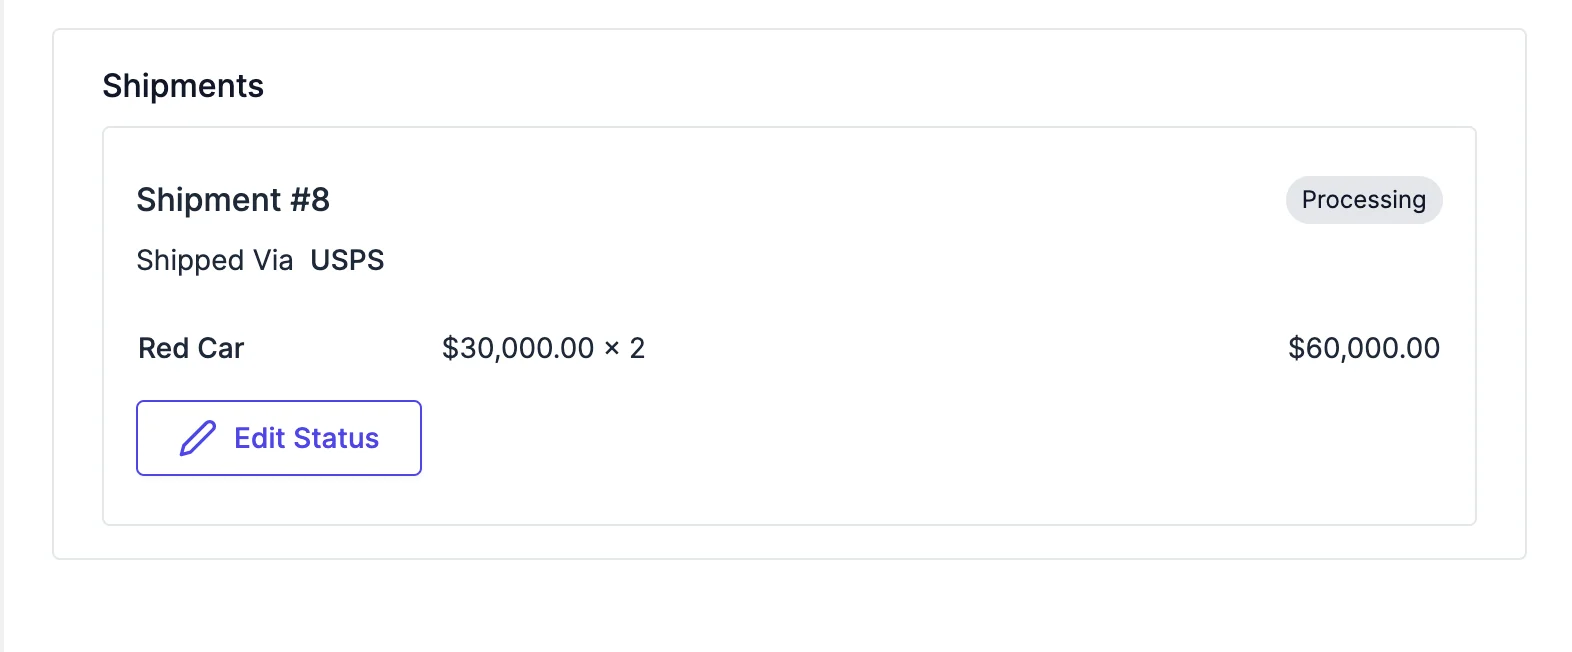
After you click Done, the shipment appears on the order.
If an order has several items, you can ship some products now and create another shipment for the rest by changing the number of products.
Send orders to a courier automatically
Section titled “Send orders to a courier automatically”If your marketplace uses third-party couriers, you can skip manual shipments. Turn on Auto-push orders to courier in Shipping → Preferences. When an order enters processing, FlyCommerce sends it to the courier the customer selected at checkout, so you do not need to create a shipment manually.
Shipment webhooks
Section titled “Shipment webhooks”Shipment changes can be sent to your own systems. The order.shipment.created and order.shipment.updated webhook events cover new and updated shipments. For setup, see Webhooks.
Refund an order
Section titled “Refund an order”You can refund a full order or part of one from the order page. Customer return and refund requests are reviewed through the process in the admin refunds and returns guide.
- Open the order and click Refund.
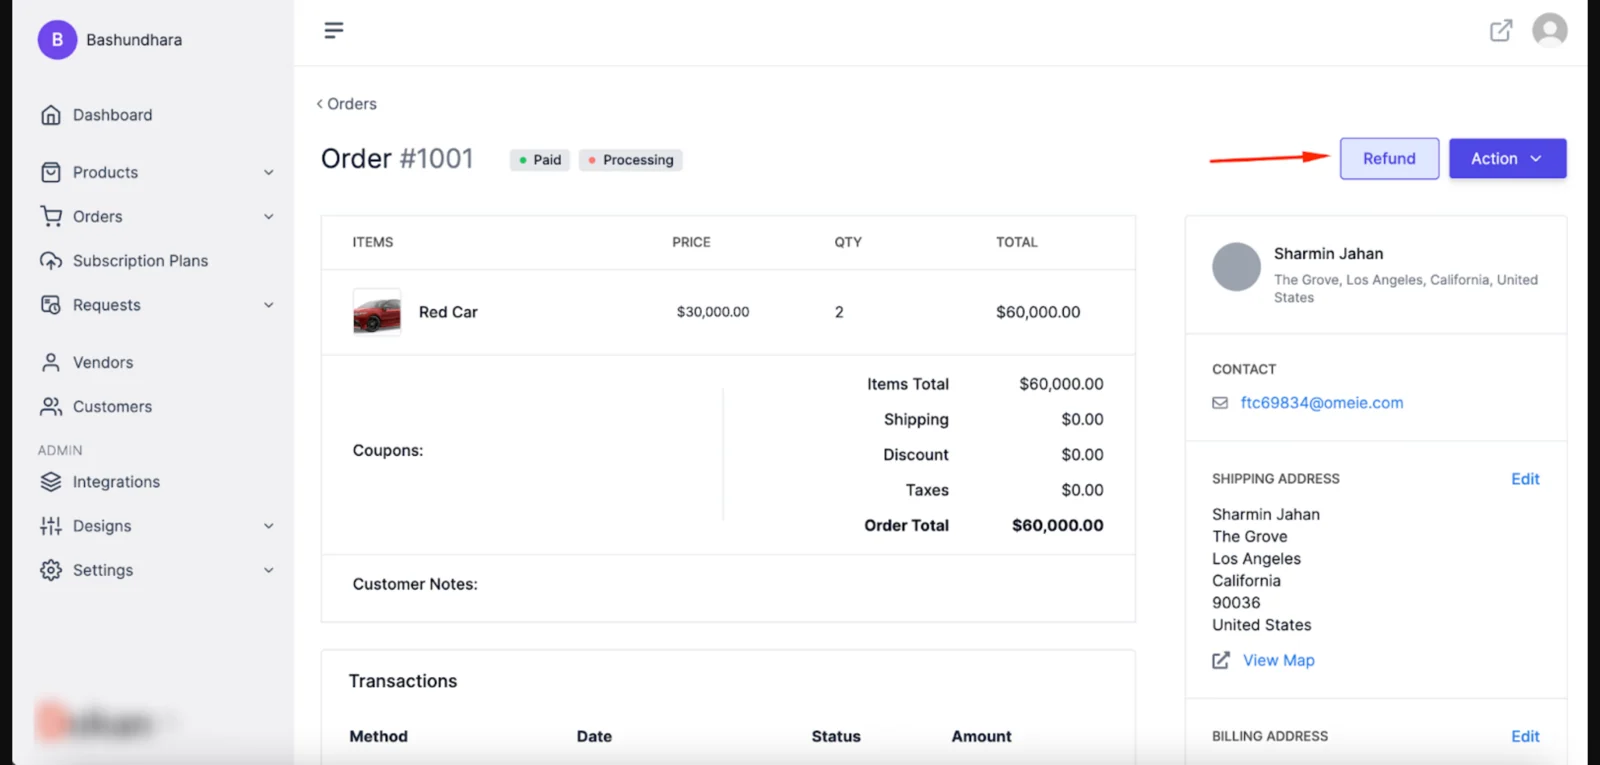
Click Refund on the order to open the refund options.
- Choose a full refund or a partial refund. For a partial refund, select the quantity of each product and the amount to refund.
- Add a refund reason if you want to record one.
- Click Refund “X” amount.
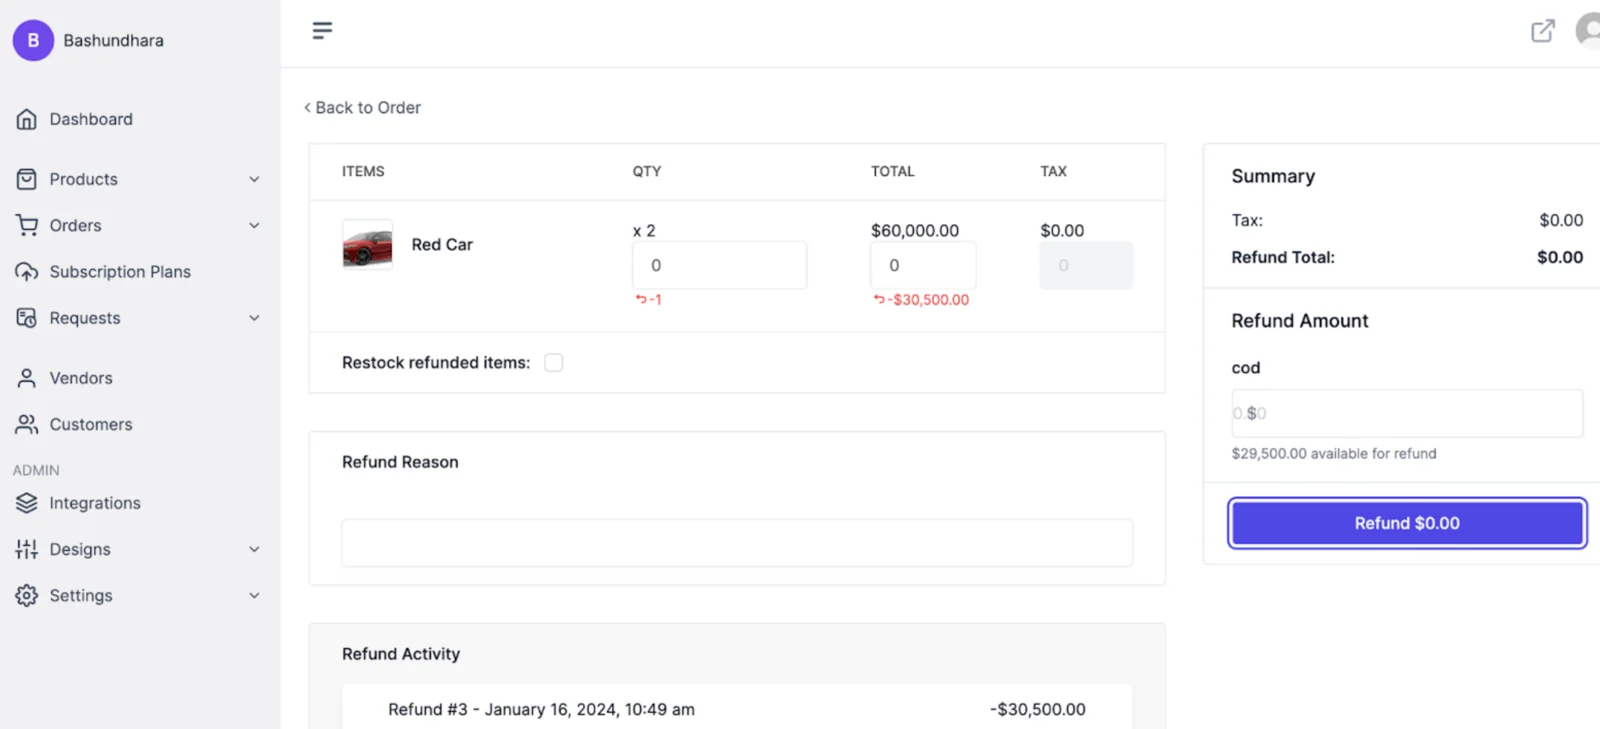
Choose the amount and quantity to refund, then confirm the refund.
After a partial refund, the order shows the refunded amount.
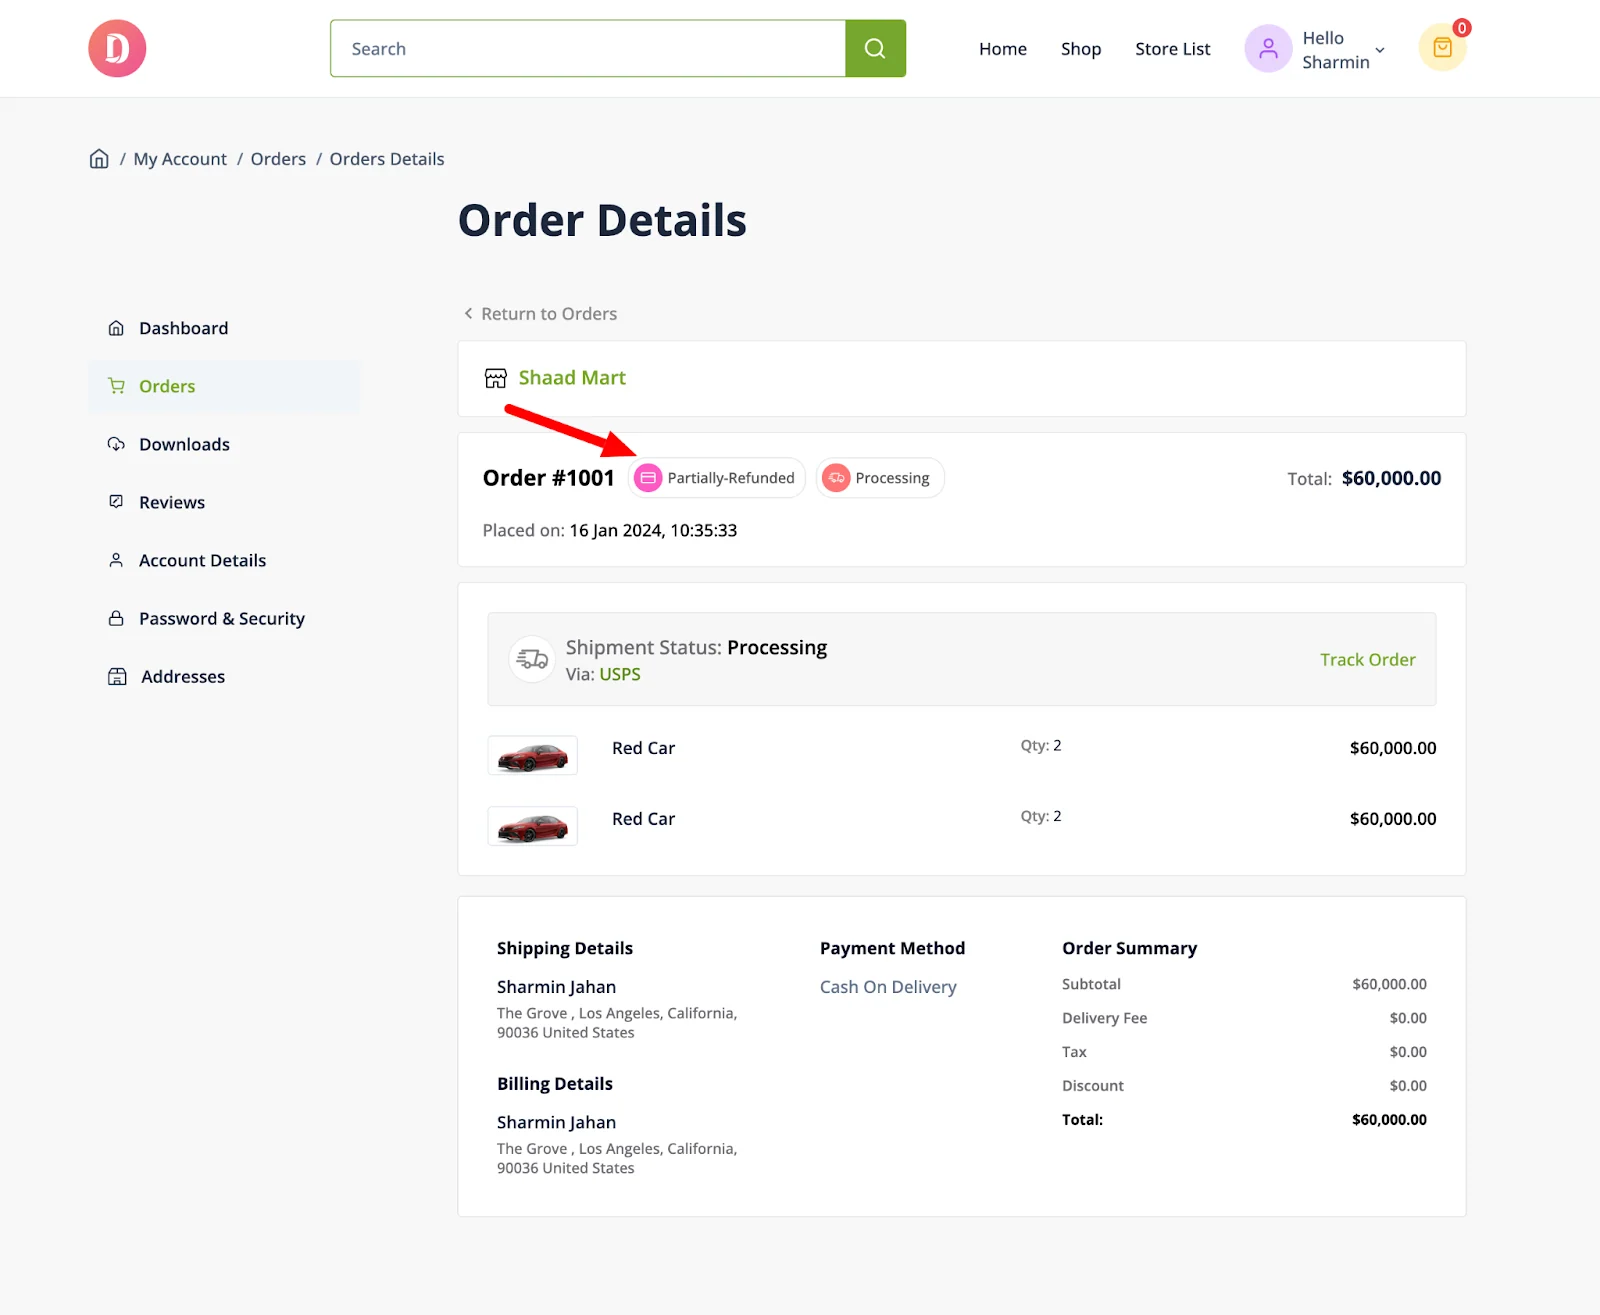
A partially refunded order shows the refund in its details.
Print packing slips and invoices
Section titled “Print packing slips and invoices”Packing slips list the products, quantities, and order numbers in a shipment. They help you check package contents and handle returns or exchanges.
- Open a completed order.
- Click Print Packing Slip.
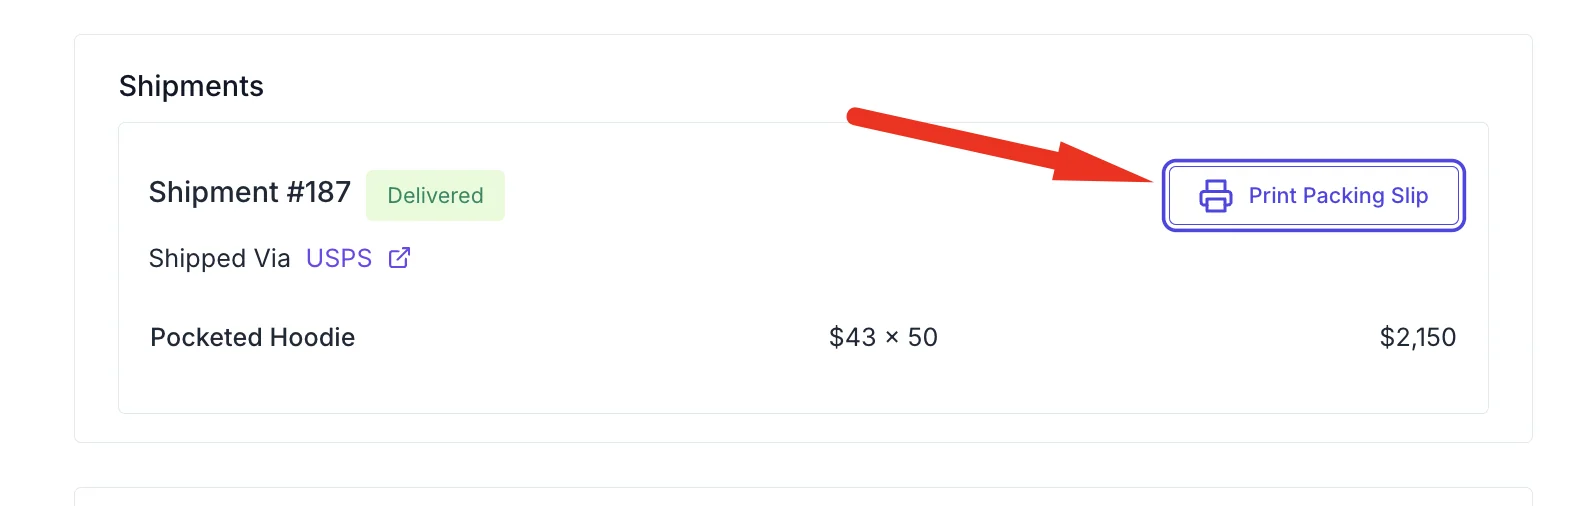
Print Packing Slip is available on completed orders.
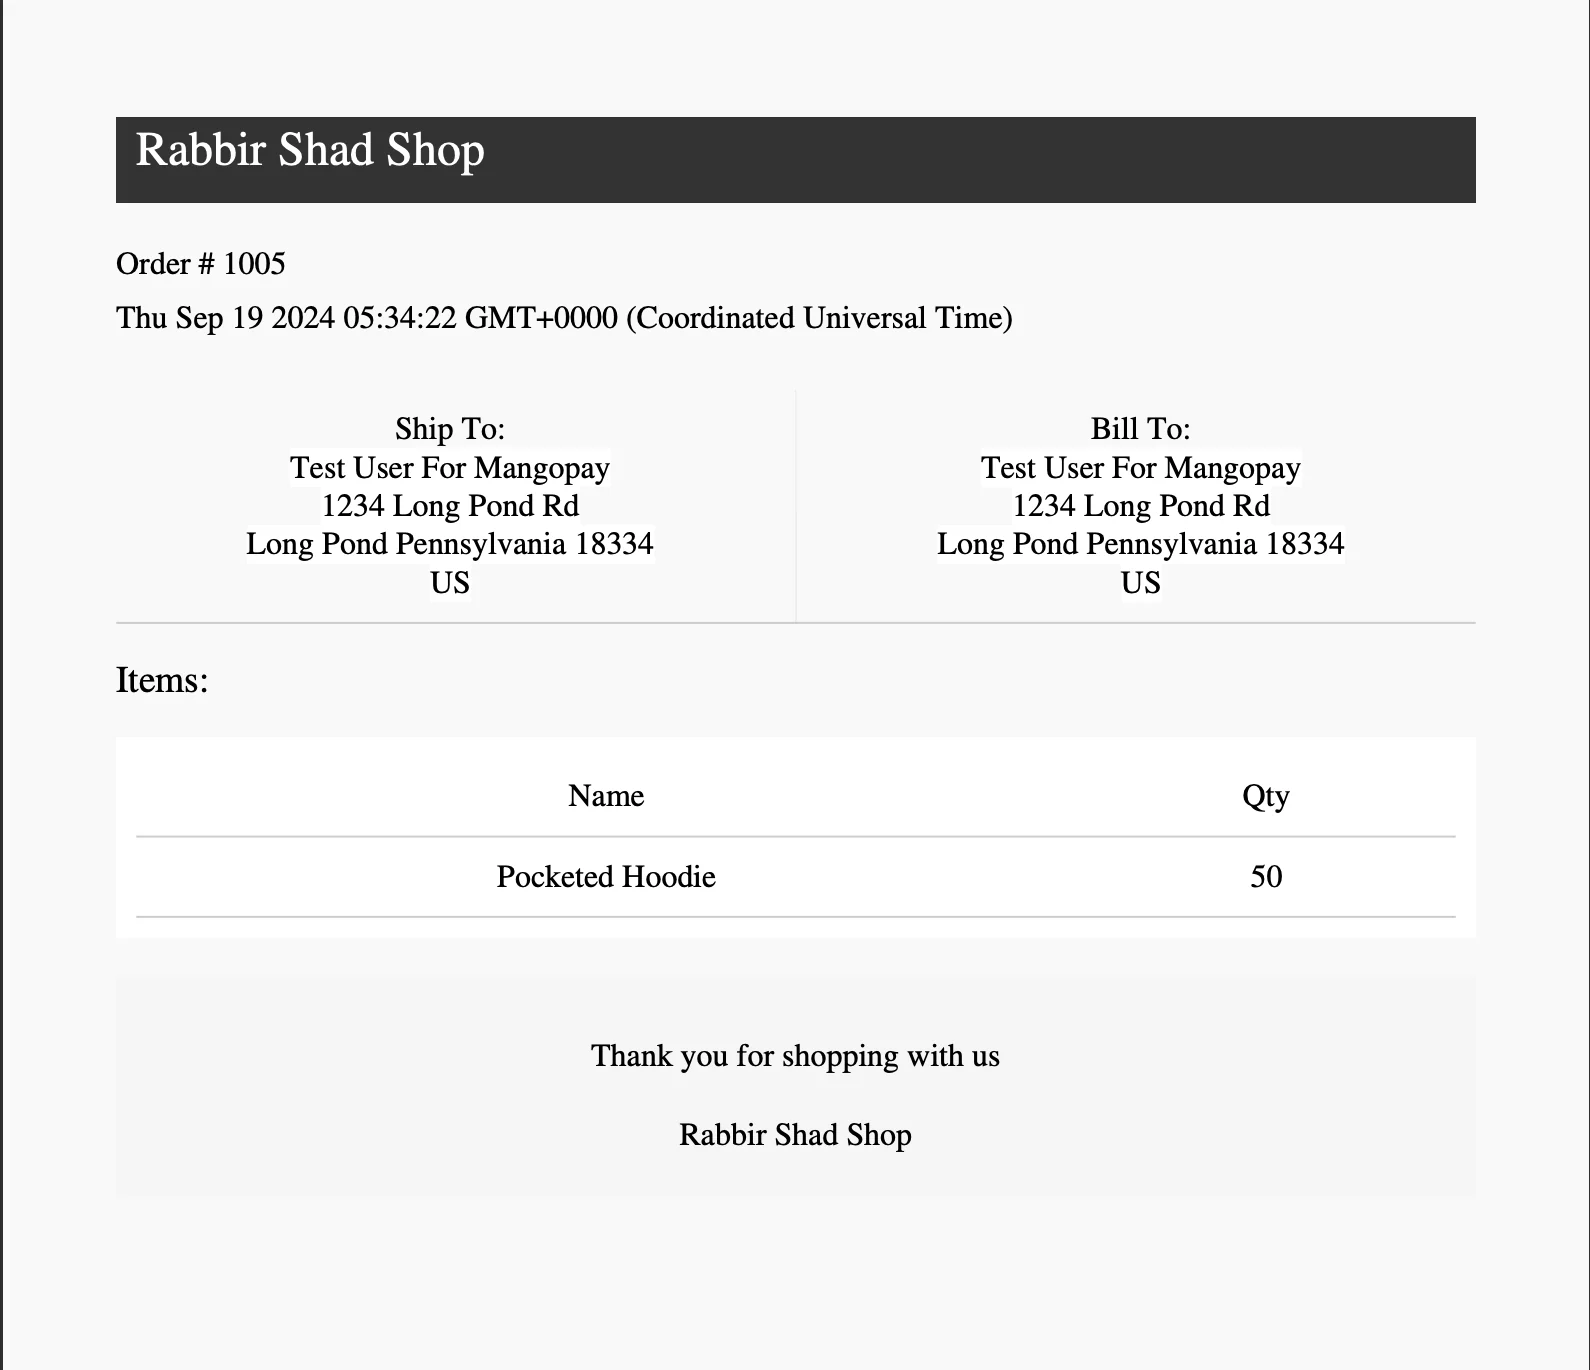
An example packing slip lists the items in the package.
A POS-size invoice is a compact receipt. It lists items, prices, taxes, the total, and the payment method, and it is sized for small receipt rolls.
- Open the Action dropdown on the order.
- Choose Download Invoice(POS).
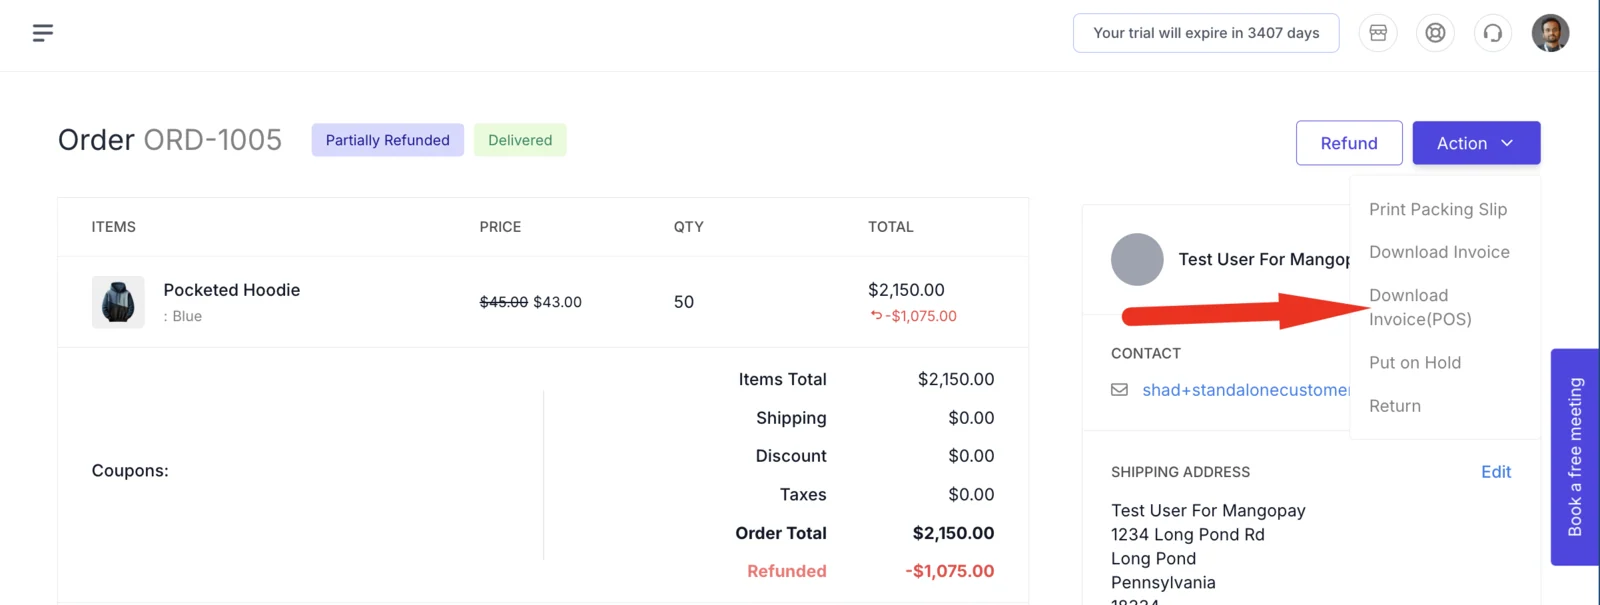
Open the Action dropdown on an order to download a POS-size invoice.
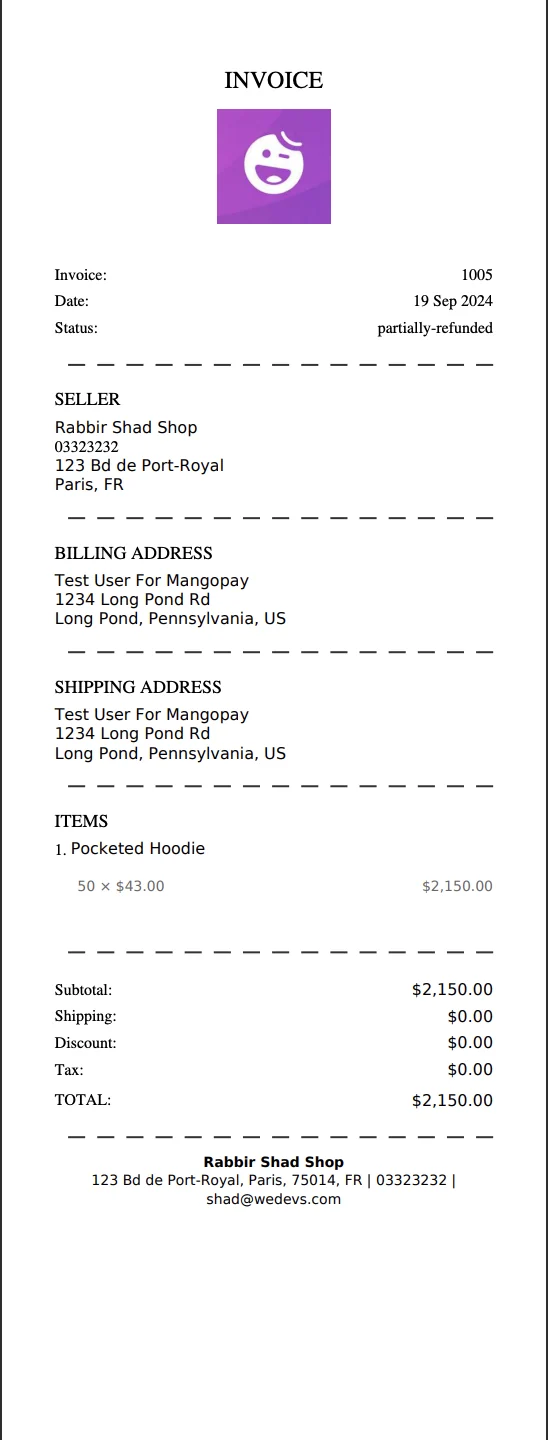
An example POS-size invoice.