Business Details, Domain, and Brand
Use Settings → General to manage your store information and branding. The page is divided into Basic, Business Details, Domain, and Brand tabs.
Update basic store settings
Section titled “Update basic store settings”- Open Settings → General and select Basic.
- Review your store name, time zone, language, currency, and contact email.
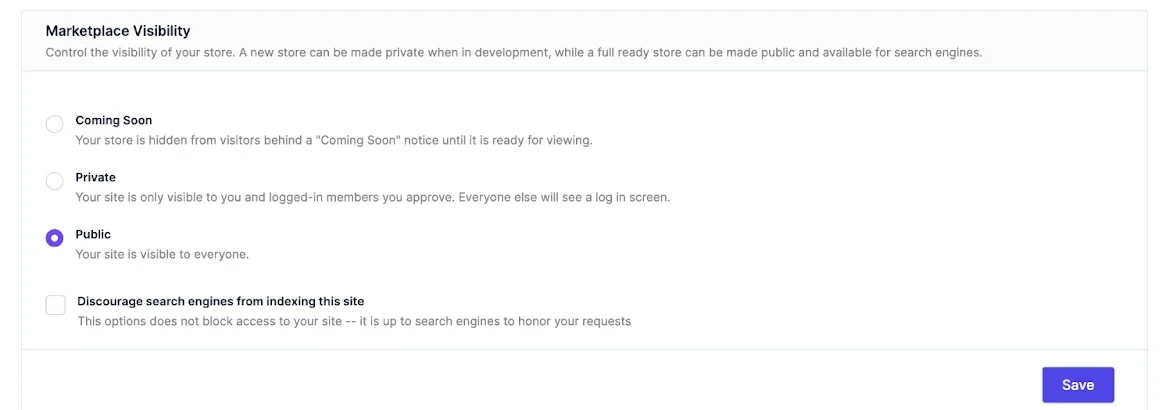
- Set guest checkout according to your checkout policy. Keep Public selected when customers should be able to visit your storefront; use a restricted visibility option only when you intentionally want to limit access.
- Review the search visibility control before changing it. Asking search engines not to index your site can reduce its visibility in search results.
- Select Save.
Add business information
Section titled “Add business information”- Select Business Details.
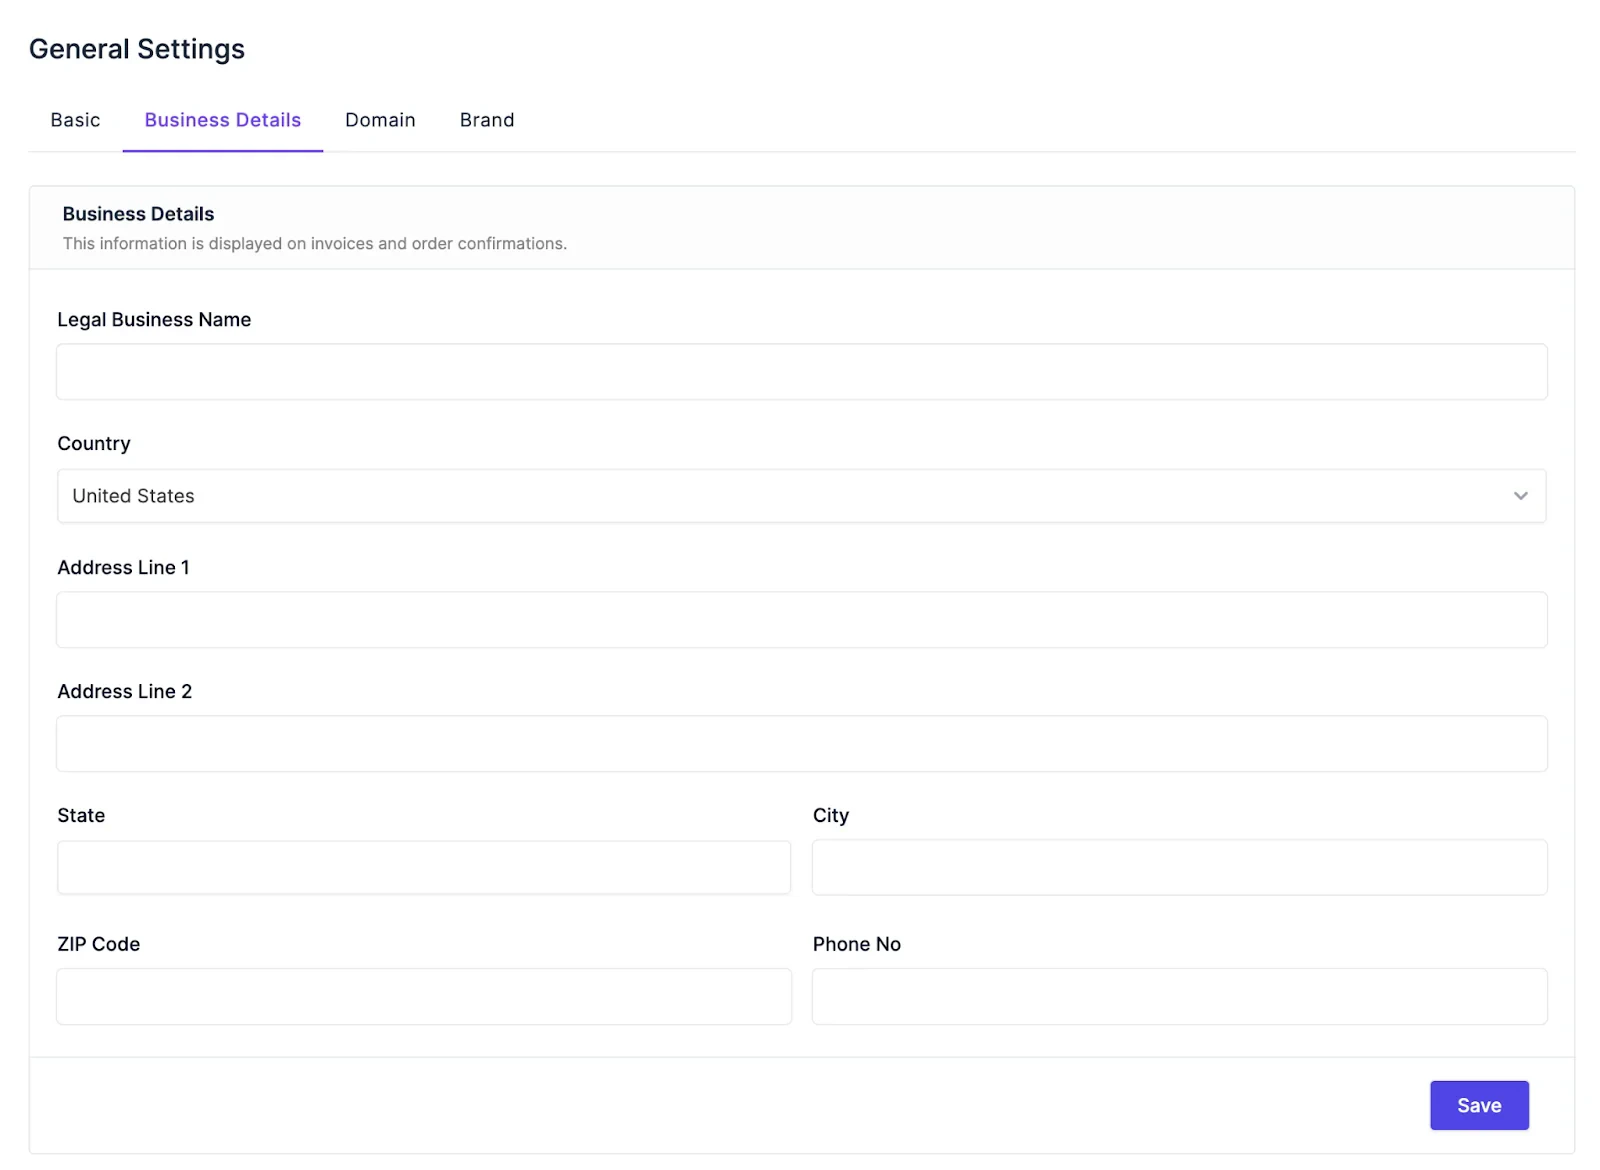
- Enter your legal business name and the country, address, state or region, city, postal code, and phone number requested by the form.
- Check the spelling and address carefully. These details may be used for tax, shipping, or customer-facing information.
- Select Save.
Connect a custom domain
Section titled “Connect a custom domain”- Select Domain and choose Add Custom Domain.
- Enter the domain you own and save it.
- Follow the domain verification and DNS instructions shown in the dashboard.
- Wait for the connection to complete, then open the domain in a private browser window.
For the full DNS setup, see Connect a custom domain.
Update your brand
Section titled “Update your brand”- Select Brand.
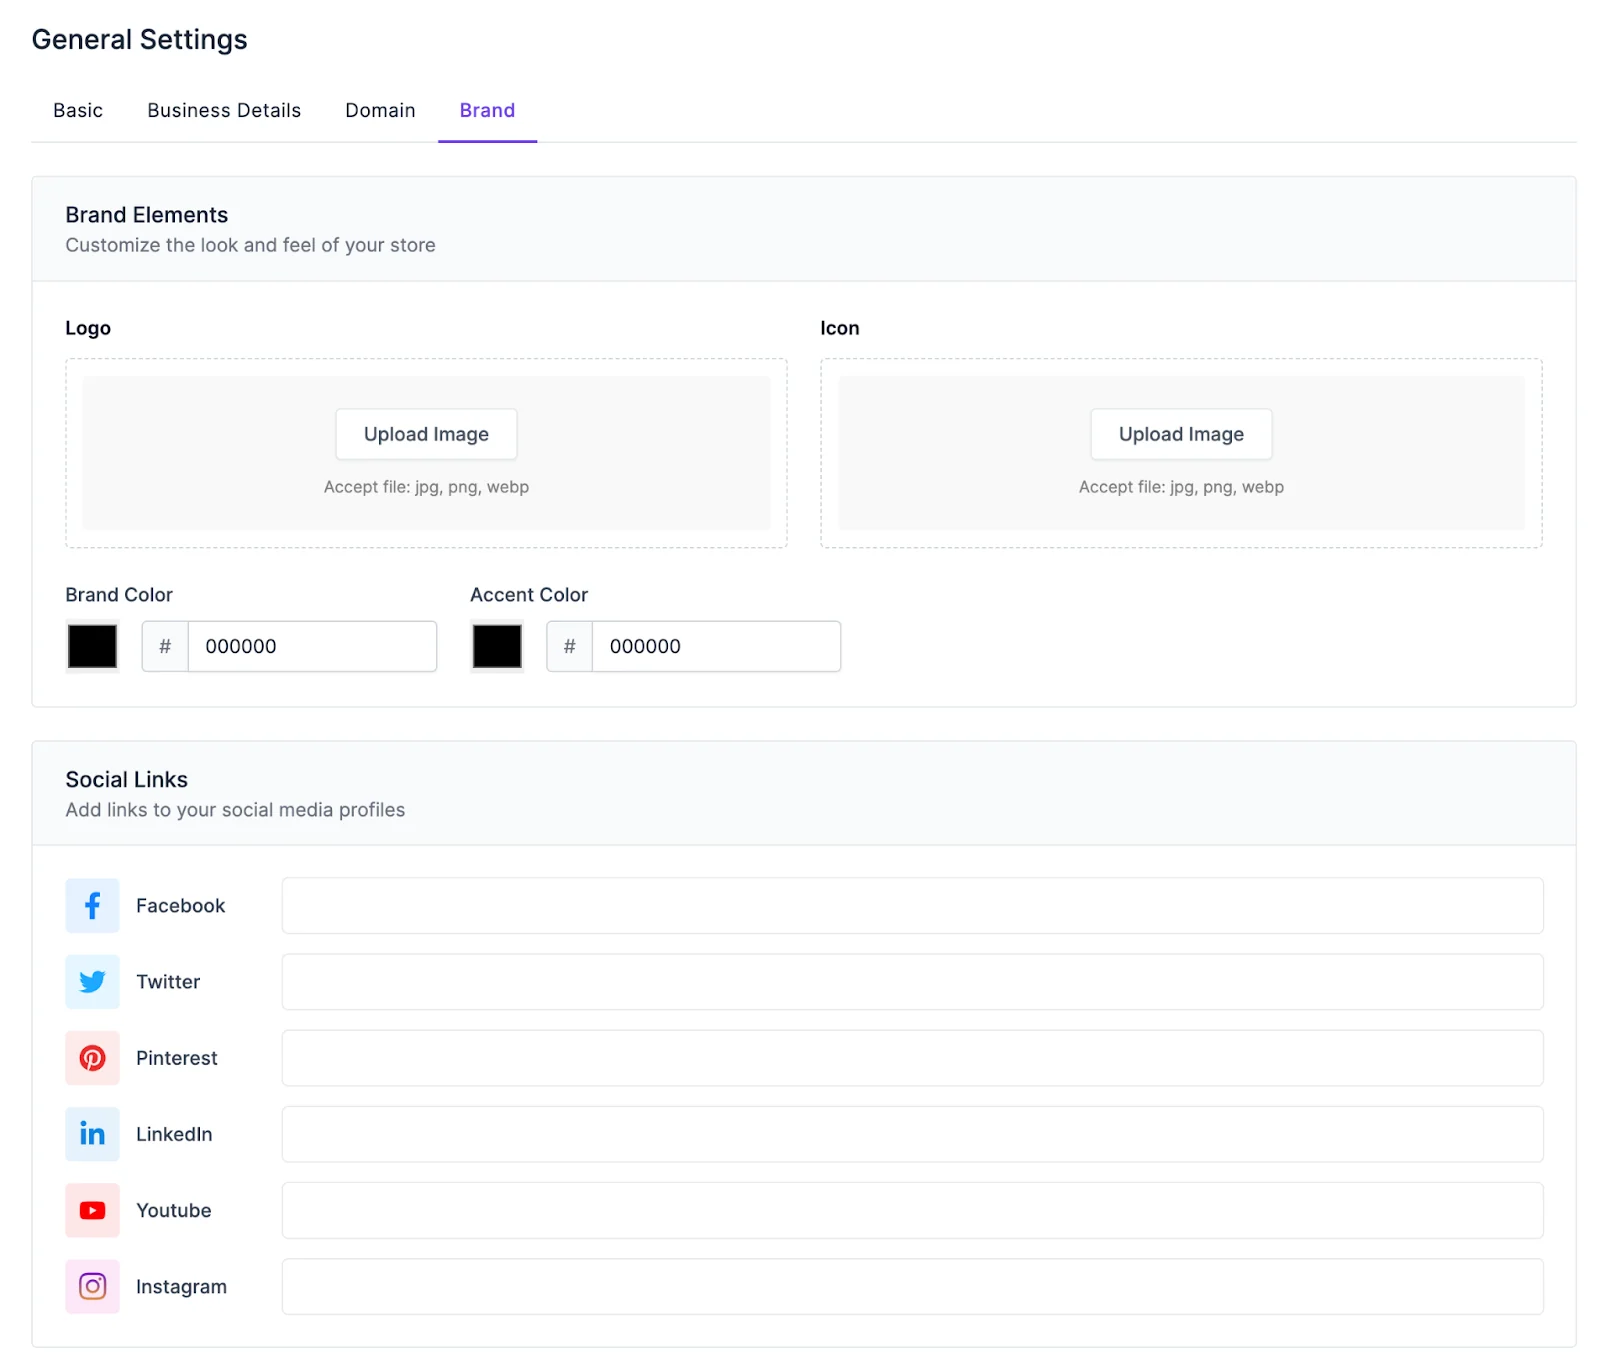
- Upload your store logo and icon.
- Choose your brand and accent colors.
- Add the social profile links you want to show to customers.
- Select Save Changes, then preview the storefront and footer.
Note: Use image files you have permission to publish. Check that your logo and colors remain legible on both light and dark backgrounds.