Approve and manage vendors
FlyCommerce lists every registered vendor on the Vendors page. Marketplace admins use it to find vendors, review their profiles, edit their details, and change their status. To add a vendor yourself, see Create a vendor as an admin.
Find a vendor
Section titled “Find a vendor”- Go to Vendors in the admin sidebar.
- Select a tab to view vendors in that group: All, Active, Inactive, Pending, on_vacation, Suspended, Blocked, Hold Payout, Deleted, or Incomplete Onboarding.
- Enter a store name in the search field and press Enter.
- To narrow the list, click the filter icon to open the Filters panel. Set Vendor Added Date, Region (Country, State, City), or Store Rating (1 to 5 stars), then click Apply.
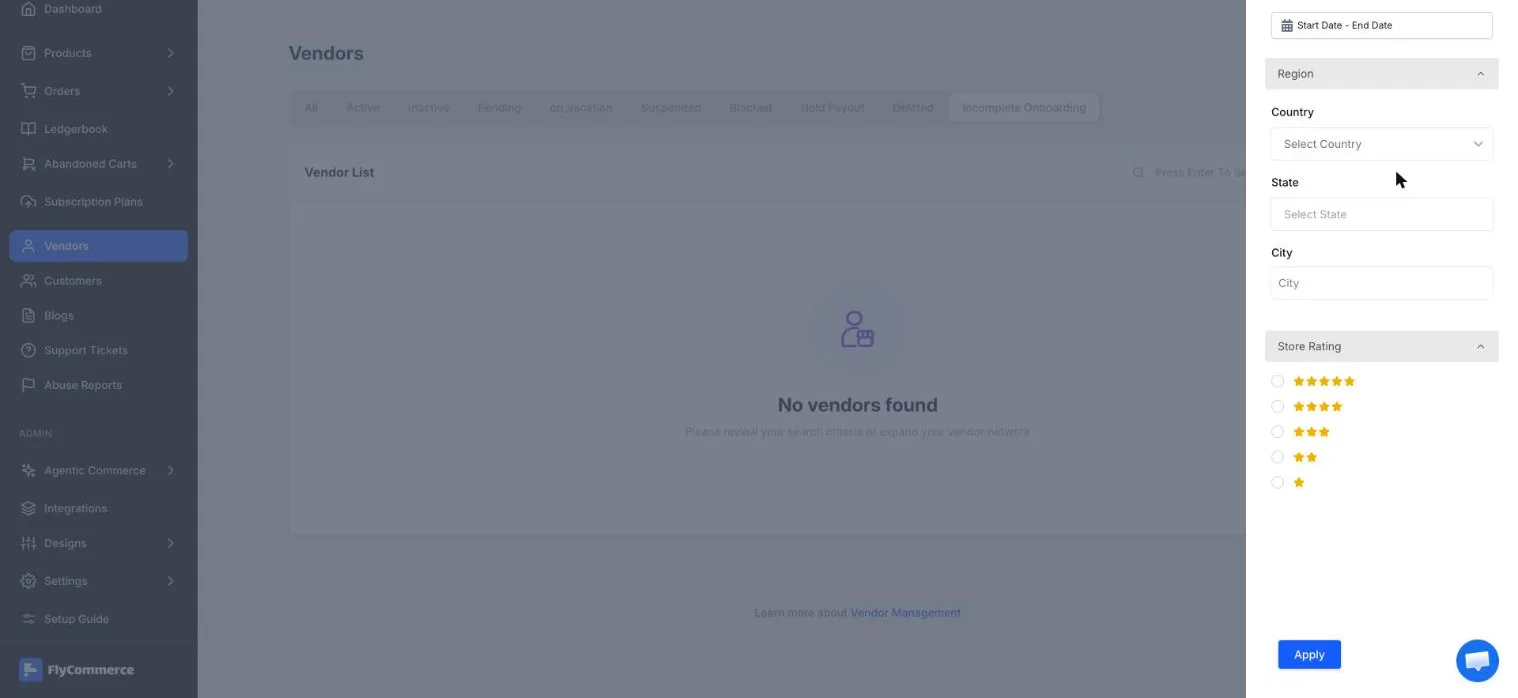
The Filters panel narrows the vendor list by added date, region, and store rating.
Each row shows the store name, email, phone, plan, status, and registration date, with an actions menu at the end of the row.
Review incomplete onboarding
Section titled “Review incomplete onboarding”Vendors who have not finished registration appear under the Incomplete Onboarding tab. Select this tab to see which vendors still need to complete setup.
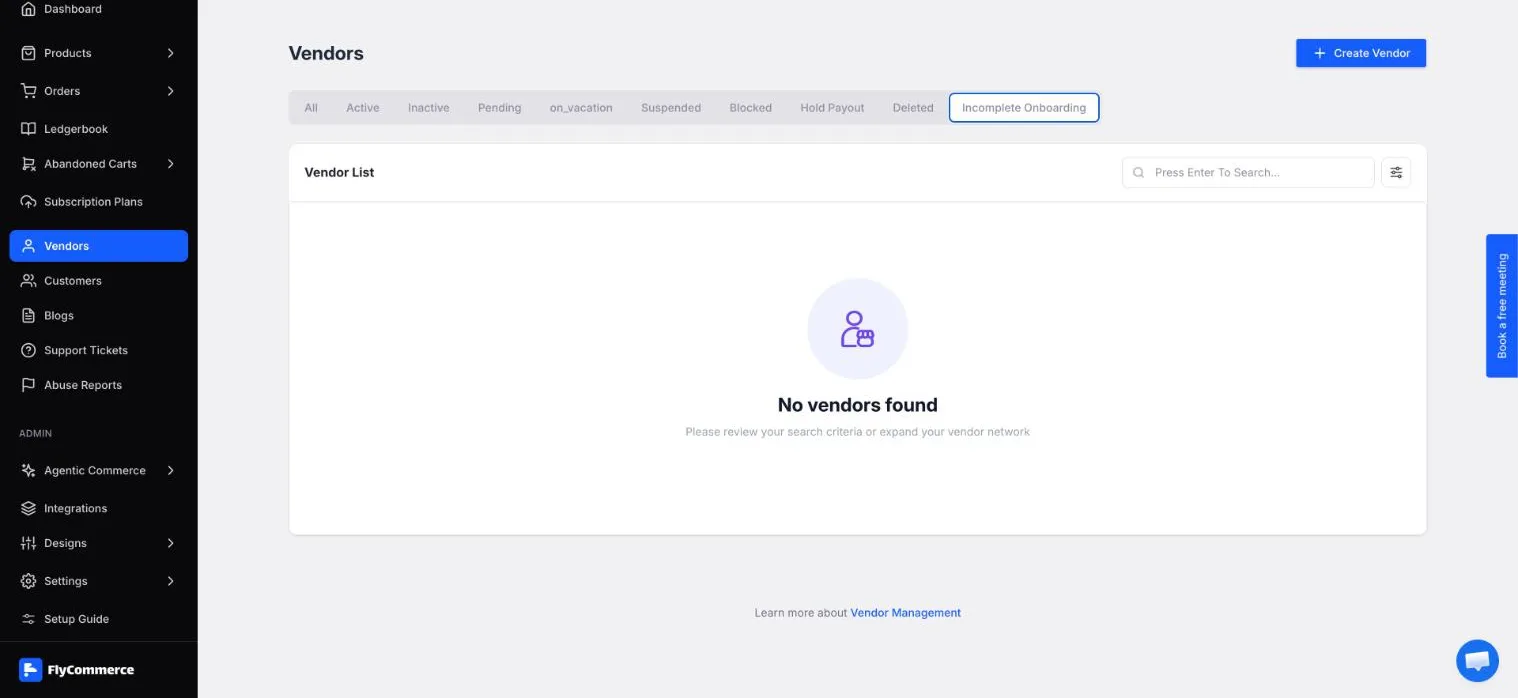
Vendors who have not finished registration appear under Incomplete Onboarding.
Admins choose which onboarding steps vendors complete at Settings → General, on the Vendor Onboarding tab. The available steps are Email Verification, Business Details, Contact Information, Identity Cards, Tax Information, and Bank Information.
Use row actions
Section titled “Use row actions”Open the actions menu (⋯) at the end of a vendor’s row to choose one of these actions:
- Edit opens the vendor’s details for editing.
- Products opens the vendor’s products.
- Mark/Unmark as test vendor flags or clears a test account.
- Delete deletes the vendor.
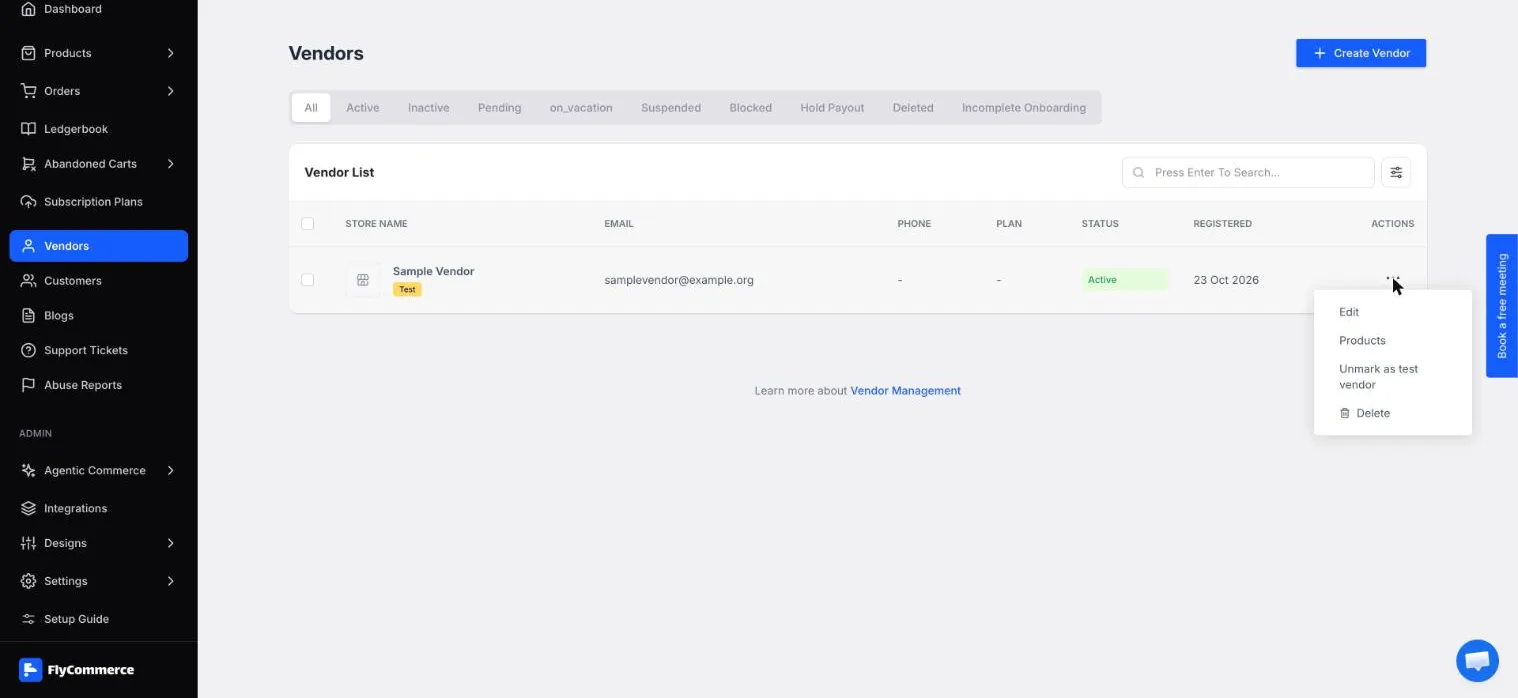
The actions menu appears at the end of each vendor row.
Open a vendor profile
Section titled “Open a vendor profile”Click a store name to open the vendor profile. The overview shows Total Orders, Items Sold, Gross Sales, Total Earnings, and Review stats. The profile has these tabs: General, Subscription, Address, Documents, and Social Options.
From the profile, click Edit Details to change the vendor’s information, Visit Store to open the storefront, or Send Email to contact the vendor.
Edit vendor details
Section titled “Edit vendor details”- Open the vendor’s actions menu and choose Edit, or open the vendor profile and click Edit Details.
- On the General tab, review or update the Store Name, Logo, Store Banner, First Name, Last Name, Email Address, Phone, Company Name, Company ID / EUID Number, and Vat / Tax number fields.
- Open the Subscription, Address, Documents, or Social Options tab to update those details.
Logos must be 150x150 JPG or PNG files up to 5MB. Store banners must be 1140x340 files up to 5MB.
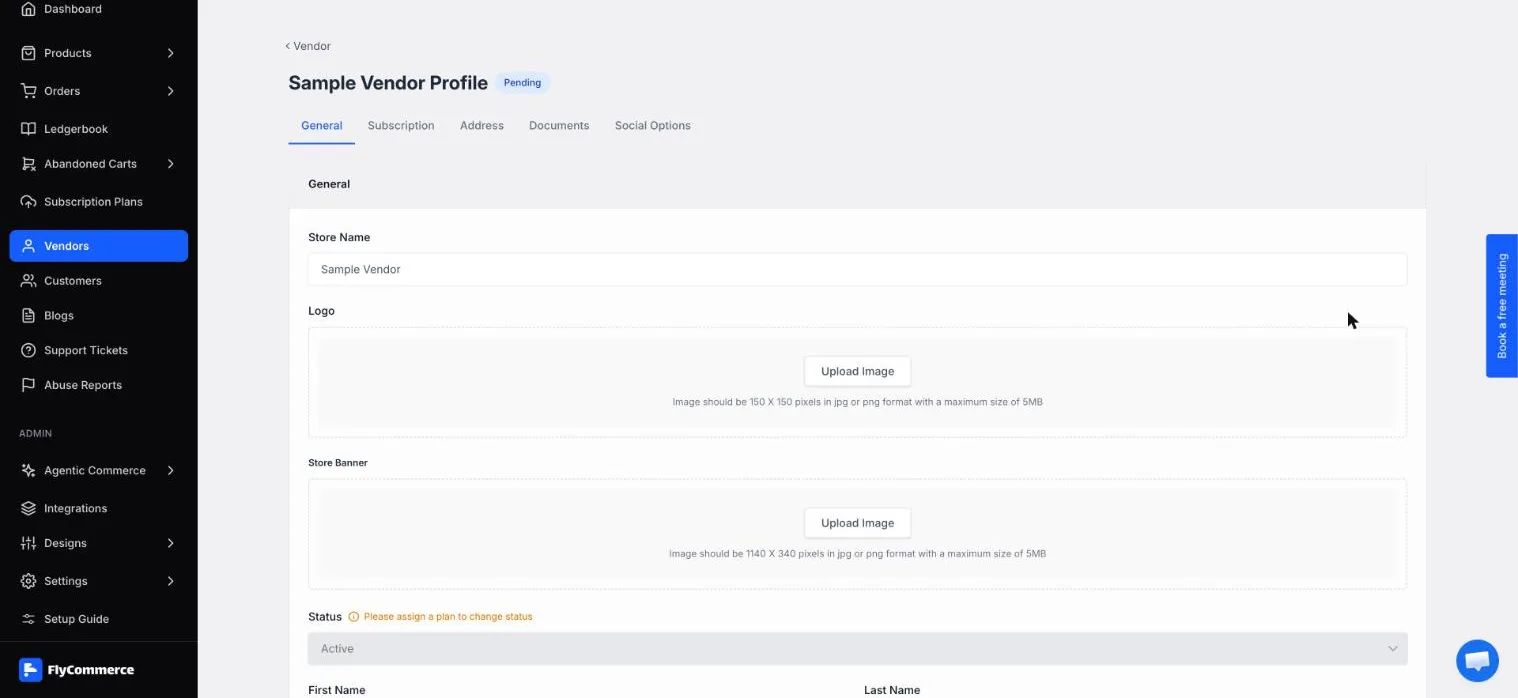
The General tab holds the store name, branding, contact details, and tax information.
Change a vendor’s status
Section titled “Change a vendor’s status”The Status field is on the General tab. A vendor must have a subscription plan assigned before you can change the status. Until a plan is assigned, the form shows the message “Please assign a plan to change status.”
Mark test vendors
Section titled “Mark test vendors”Use Mark/Unmark as test vendor from the actions menu to flag a vendor account used for testing. Test vendors show a Test badge in the vendor list, so you can tell them apart from live stores.