Set Up Meta Pixel
Meta Pixel helps measure actions people take on your storefront after interacting with Meta ads. This guide covers the manual setup method. If your dashboard provides a dedicated Meta Pixel integration, use that connection instead and do not install the same Pixel a second time.
Before you start
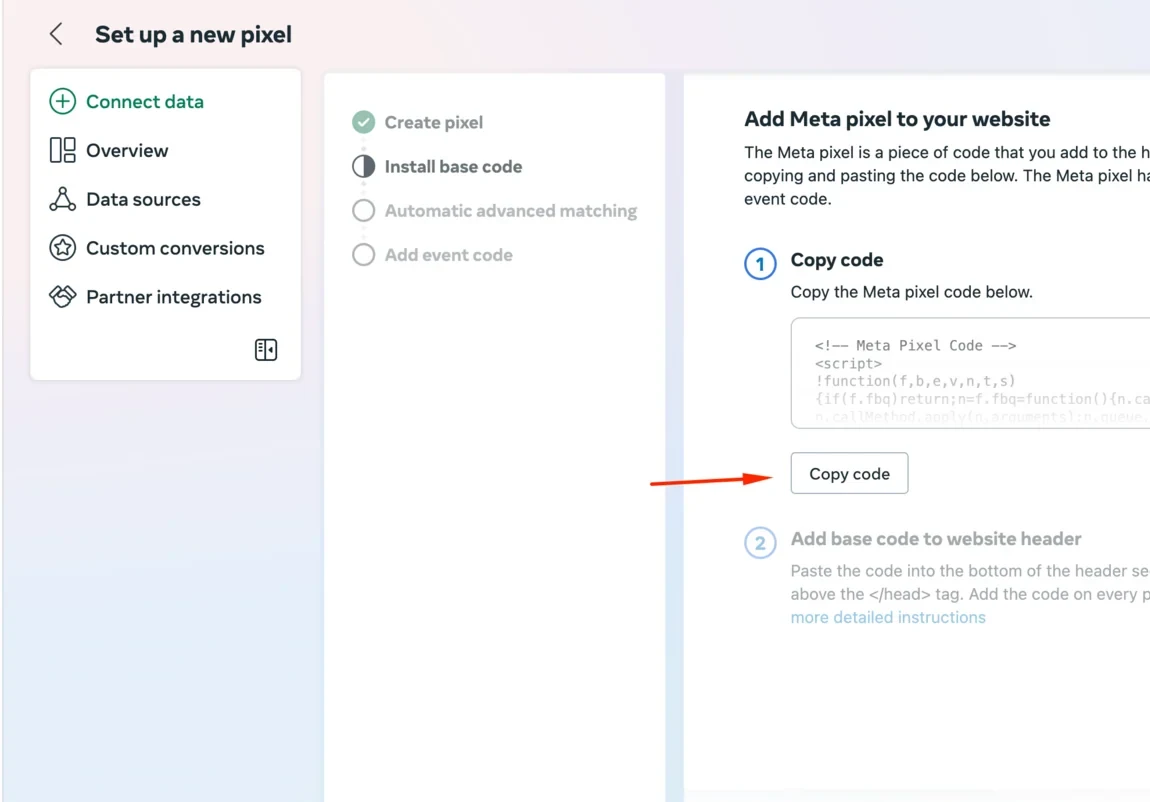
Section titled “Before you start”- In Meta Events Manager, create or select the data source for your storefront.
- Copy the Pixel’s base code. Keep your Meta password and access tokens private.
- Sign in to FlyCommerce with permission to edit store settings.
Add the base code to your storefront
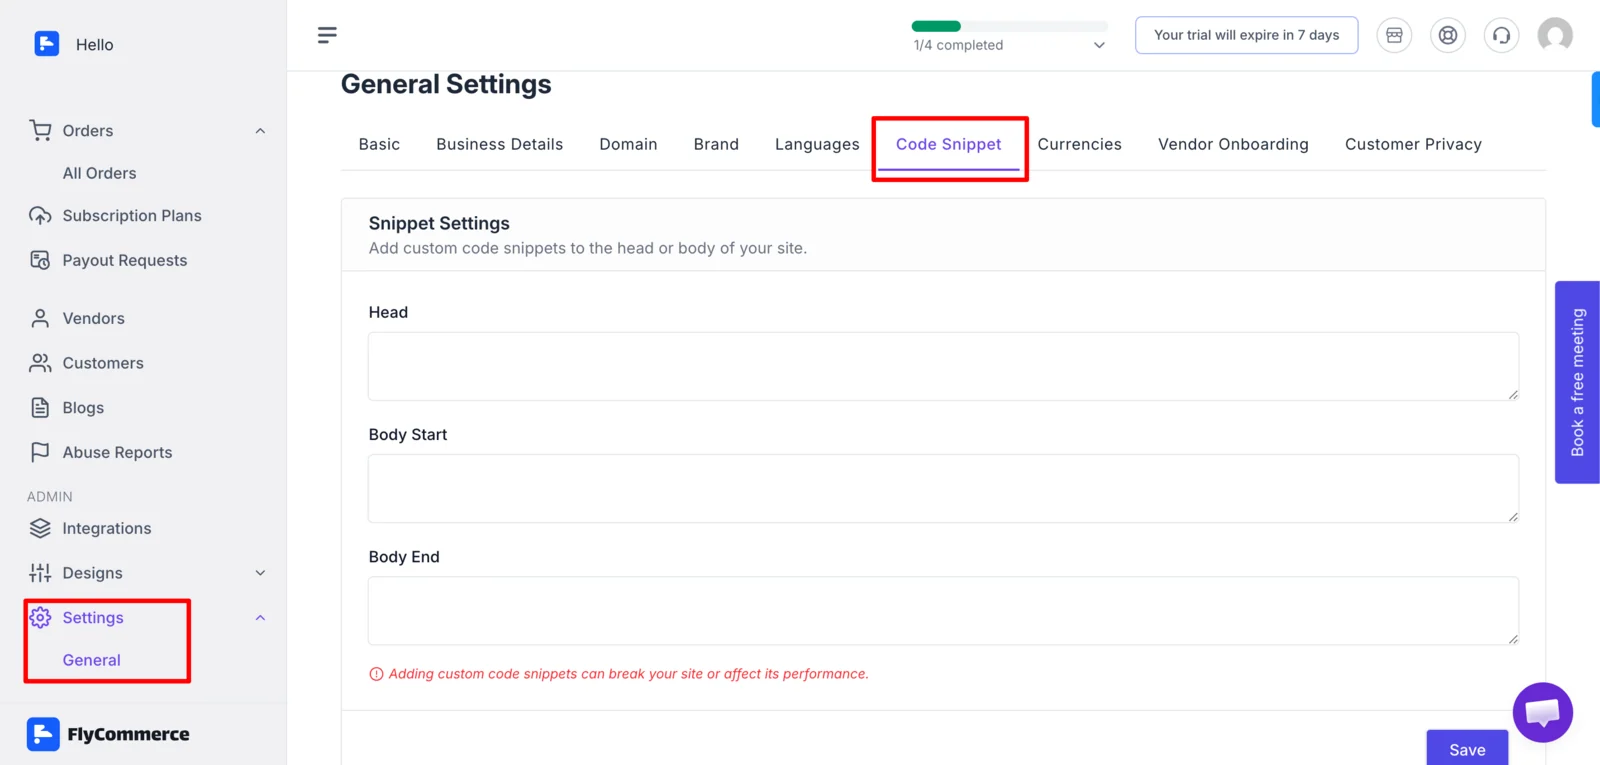
Section titled “Add the base code to your storefront”- In the FlyCommerce dashboard, open Settings → General.
- Select the Code Snippet tab.
- Paste the Meta Pixel base code into the Head field.
- Select Save.
Important: Install the base code once. Do not use both a built-in Pixel integration and the same base code; duplicate installation can count an event more than once.
Test event tracking
Section titled “Test event tracking”- In Meta Events Manager, open the test-events tool for the same Pixel.
- Visit your storefront in another browser tab.
- Perform a test action, such as viewing a product or completing a test purchase.
- Confirm that the expected event appears in Events Manager.
- Check that one action does not produce duplicate events.
Ad blockers, consent choices, and browser privacy settings can affect what Meta receives. Confirm the event status in Events Manager before relying on campaign reports.