Create a vendor as an admin
Marketplace admins can add vendors directly from the dashboard instead of waiting for them to register on the storefront. Use this when you onboard a seller yourself, migrate an existing seller, or set up a test vendor.
Open the Vendors page
Section titled “Open the Vendors page”- In the admin sidebar, select Vendors.
- Review the Vendor List. It shows each vendor’s Store Name, Email, Phone, Plan, Status, and Registered date. Use the status tabs (All, Active, Inactive, Pending, Suspended, Blocked, Hold Payout, Deleted, Incomplete Onboarding, and others) to filter the list.
- Select Create Vendor.
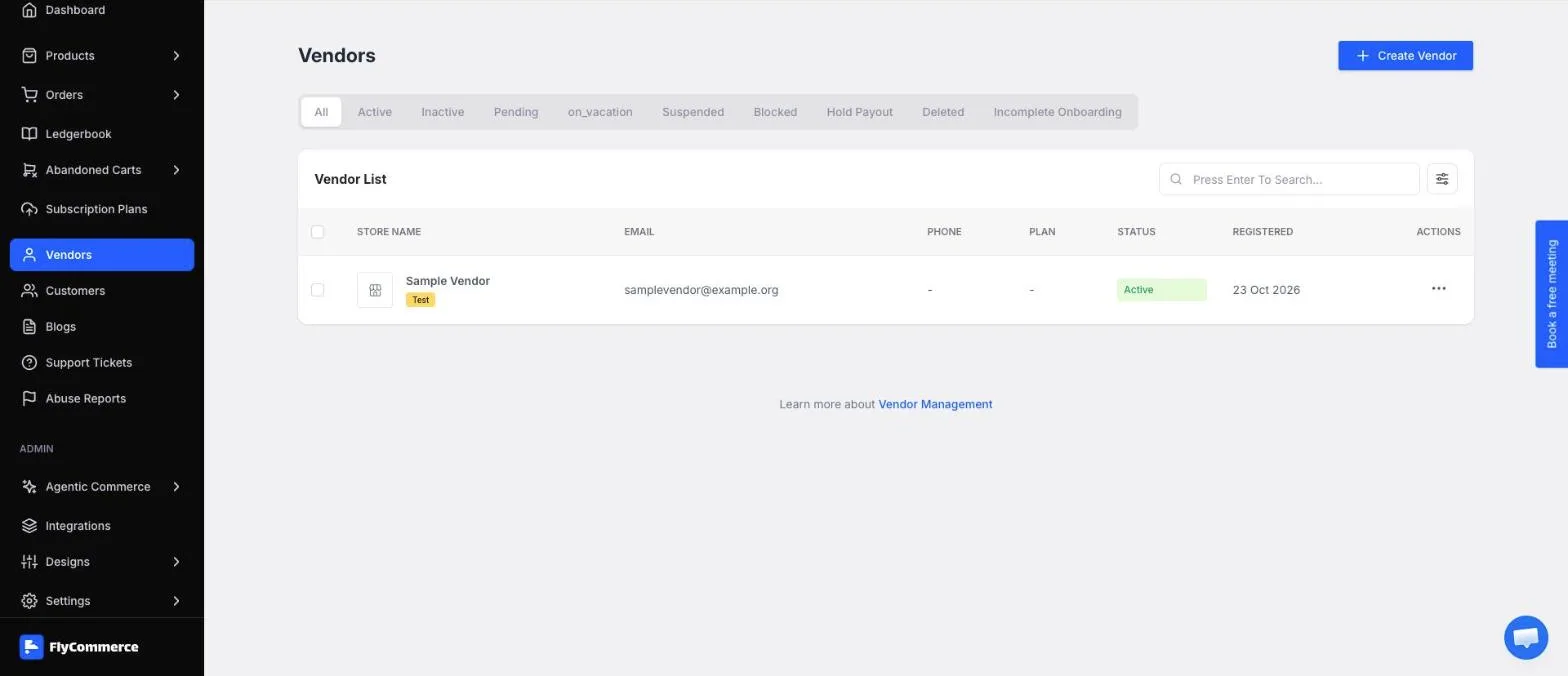
The Vendors page lists every vendor. Create Vendor is at the top right.
Fill in the vendor details
Section titled “Fill in the vendor details”All fields in the Create Vendor form are required.
- Enter the vendor’s First Name and Last Name.
- Enter the Store Name. This is the name shoppers see on the vendor’s store.
- Select the Country, then enter the Address, State, City, and Postal Code.
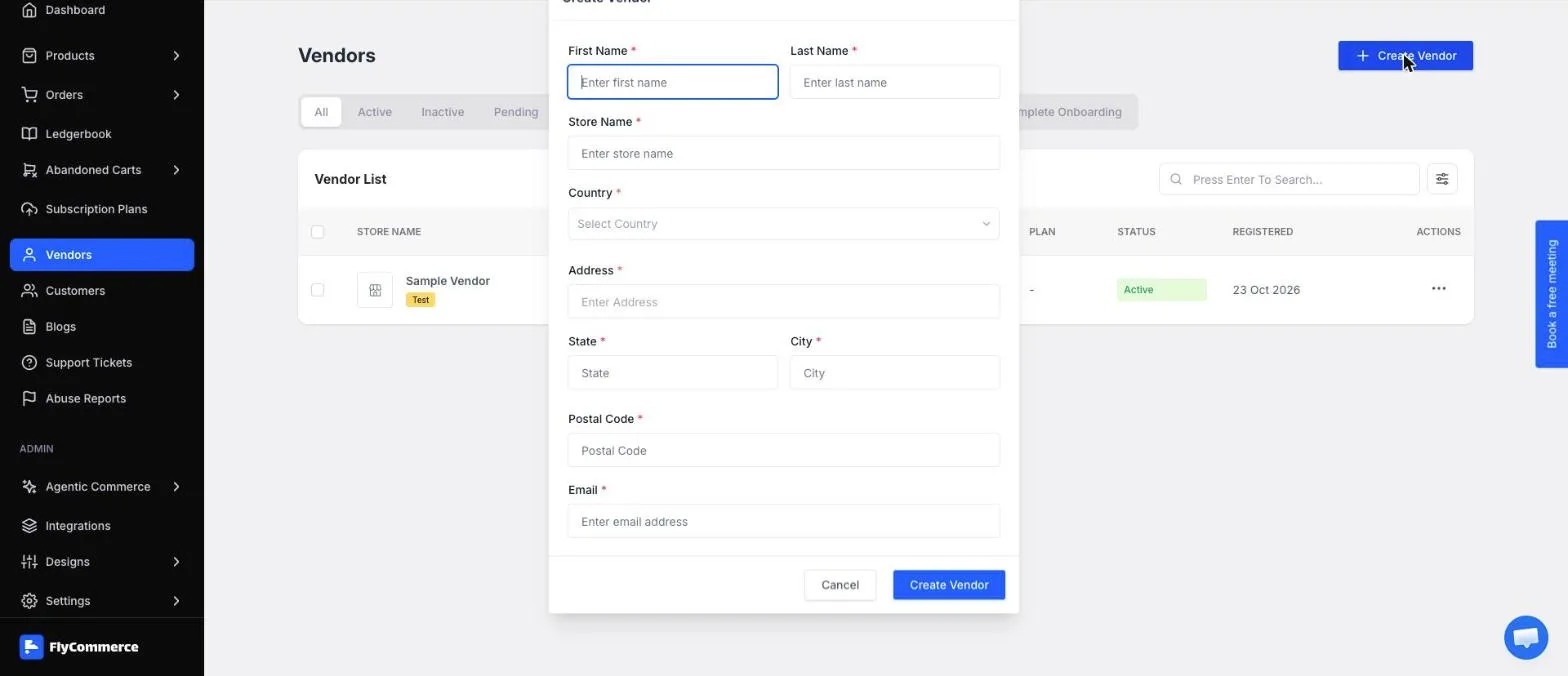
The first part of the form collects the vendor’s name, store name, and address.
- Enter the vendor’s Email and Phone Number. The vendor signs in with this email.
- Enter a Password for the vendor account. Share it with the vendor through a secure channel and ask them to change it after their first sign-in.
- Select a Subscription Plan. The list shows the plans published in Subscription Plans.
- Select Create Vendor. To discard the form, select Cancel.
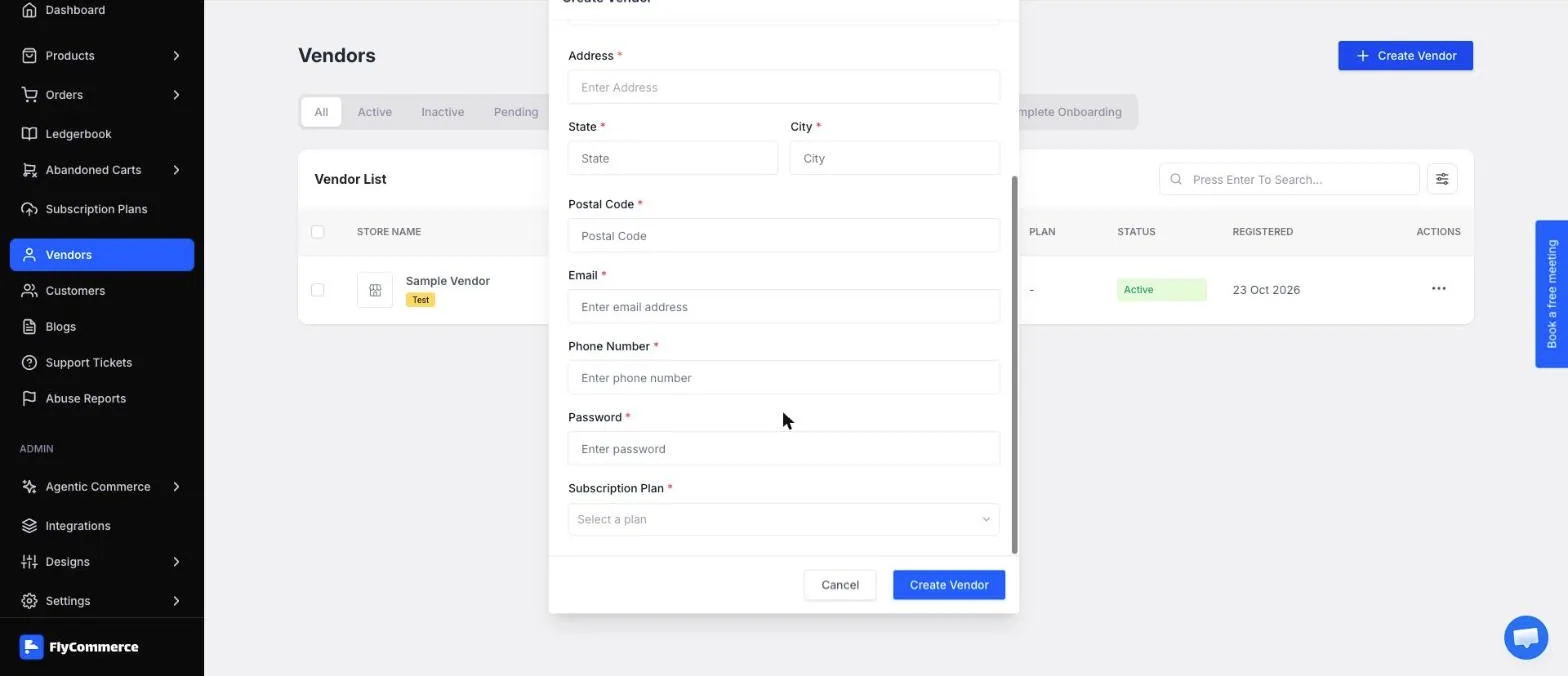
The second part of the form sets the sign-in details and the subscription plan.
Review the new vendor
Section titled “Review the new vendor”The new vendor appears in the Vendor List. Select the store name to open the vendor profile.
The profile shows the registration date and the vendor’s Total Orders, Items Sold, Gross Sales, Total Earnings, and Review count. Use the tabs to review General, Subscription, Address, Documents, and Social Options.
- Select Edit Details to change the vendor’s information.
- Select Visit Store to open the vendor’s storefront page.
- Select Send Email to contact the vendor.
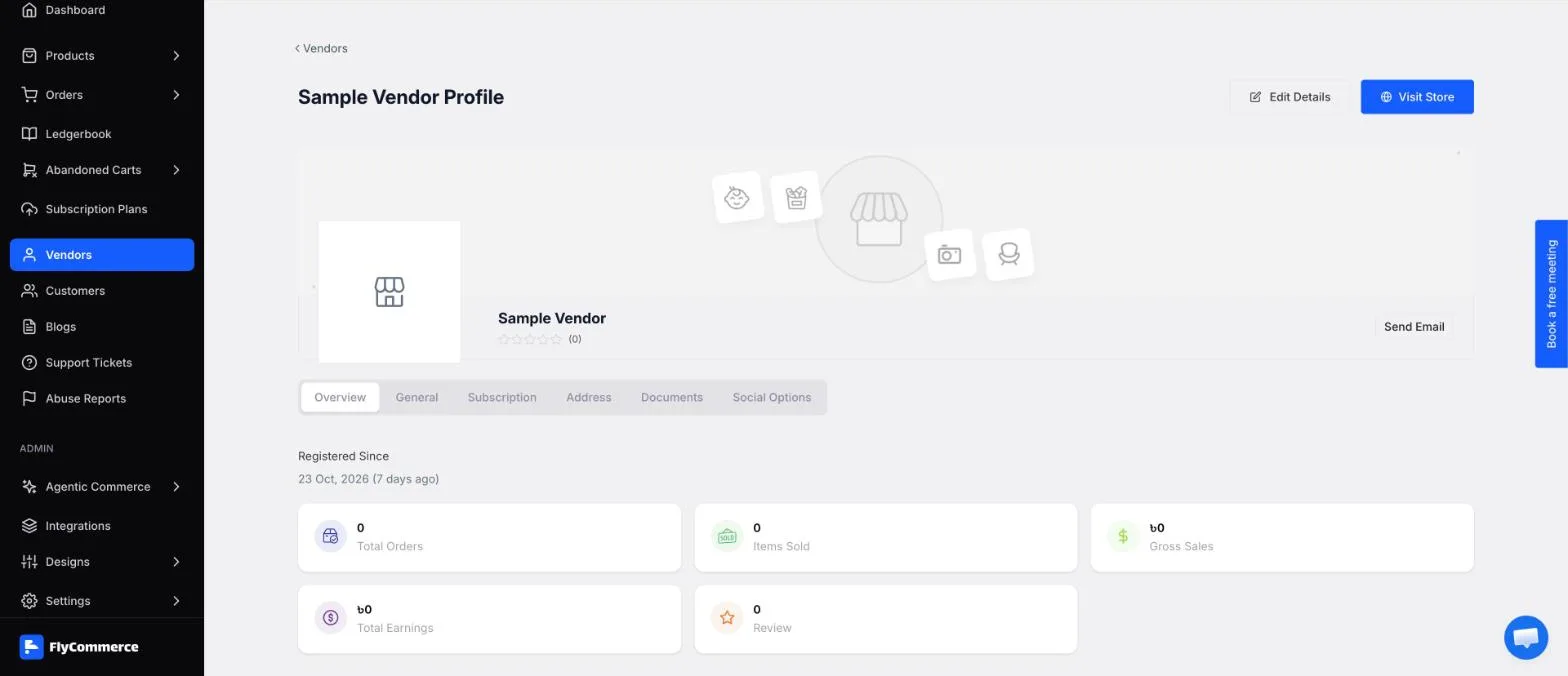
The vendor profile summarizes sales and links to the vendor’s details.
Next steps for the vendor
Section titled “Next steps for the vendor”After you create the account, the vendor can sign in and finish setting up their store, such as store details, shipping, and payout information. Point them to these guides: