Set up WhatsApp Business and live chat
FlyCommerce connects your store or marketplace to WhatsApp in two ways. WhatsApp Business sends order and delivery updates from your own WhatsApp number, and Live Chat lets vendors and customers chat over WhatsApp from your store pages. Store owners and marketplace admins set up both from the Integrations page.
Open the Integrations page
Section titled “Open the Integrations page”- In the admin sidebar, select Integrations.
- Find the WhatsApp Business card, which sends order and delivery updates from your own WhatsApp Business number. Select Manage to set it up.
- Find the Live Chat card, which provides live chat between vendor and customer via WhatsApp. Select Connect to configure it.
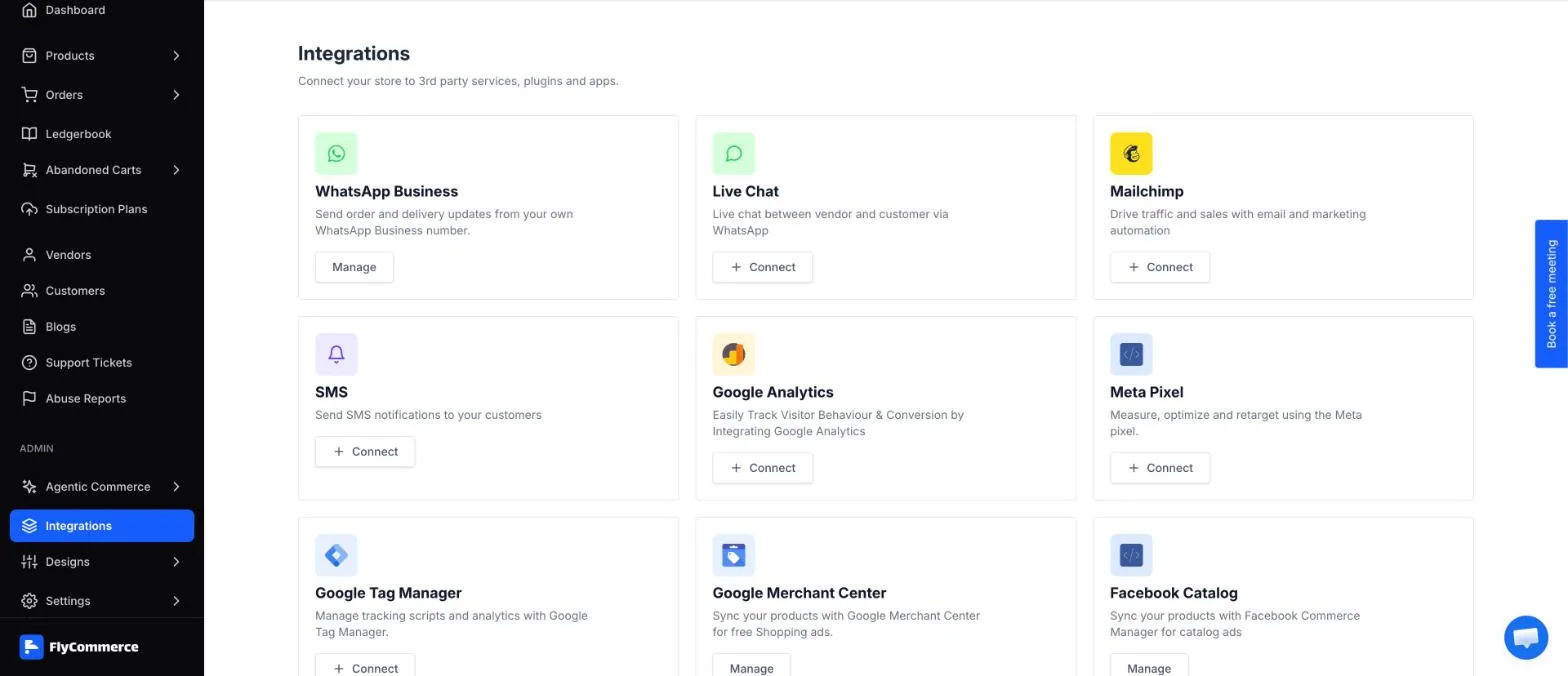
The Integrations page lists the WhatsApp Business and Live Chat cards.
Choose your WhatsApp setup
Section titled “Choose your WhatsApp setup”On the WhatsApp Business page, the Set up WhatsApp section asks What kind of WhatsApp do you have? Choose the option that matches your setup. You can change this later.
- I have a Meta Business app: Sends order updates automatically. Requires a WhatsApp Business Account and an app secret.
- My number is with Gupshup: Sends order updates through Gupshup, using the API key and app from your Gupshup account.
- I use the WhatsApp Business app: Shoppers message you. Order updates cannot be sent automatically without a Meta app.
- I use a regular WhatsApp number: Shoppers message you on your usual number.
Choose the first or second option if you want automatic order and delivery updates. The third and fourth options are click-to-chat only.
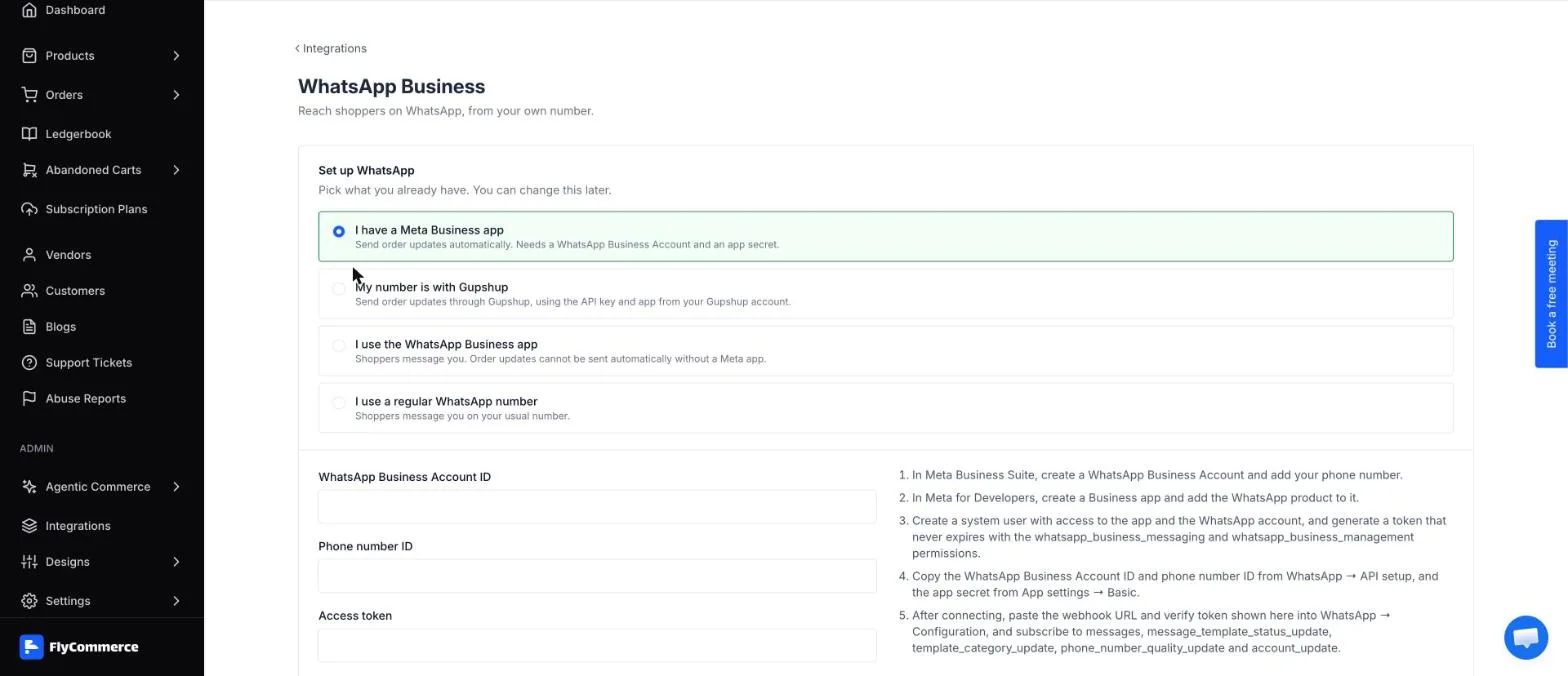
The WhatsApp Business page offers four setup options. The Meta Business app option shows its connection fields.
Connect with a Meta Business app
Section titled “Connect with a Meta Business app”Use this option for automatic order and delivery updates.
- In Meta Business Suite, create a WhatsApp Business Account and add your phone number.
- In Meta for Developers, create a Business app and add the WhatsApp product to it.
- Create a system user with access to the app and the WhatsApp account. Generate a token that never expires, with the
whatsapp_business_messagingandwhatsapp_business_managementpermissions. - Copy the WhatsApp Business Account ID and Phone number ID from WhatsApp → API setup. Copy the app secret from App settings → Basic.
- In FlyCommerce, enter the WhatsApp Business Account ID, Phone number ID, Access token, and App secret in their fields, then select Connect.
- Copy the webhook URL and verify token shown on the page into WhatsApp → Configuration in Meta for Developers. Subscribe to
messages,message_template_status_update,template_category_update,phone_number_quality_update, andaccount_update.
Connect with Gupshup
Section titled “Connect with Gupshup”Use this option if your WhatsApp number is with Gupshup.
- In Gupshup, open the app that your WhatsApp number belongs to.
- Copy the app id and the app name exactly as Gupshup shows them.
- Copy your API key from your Gupshup account settings.
- In Gupshup, create your order update templates with the names shown on the page, then wait for approval.
- In FlyCommerce, enter the API key, App id, App name, and WhatsApp number in their fields, then select Connect. Connecting registers the callback URL with Gupshup, so replies and receipts reach your store.
Connect a regular number or WhatsApp Business app
Section titled “Connect a regular number or WhatsApp Business app”The WhatsApp Business app and regular number options are click-to-chat only. Shoppers start the conversation, and you cannot message them first.
- Select I use the WhatsApp Business app or I use a regular WhatsApp number.
- Enter your WhatsApp number.
- Enter the Message the shopper starts with text, such as “Hello, I have a question about my order.”
- Select Save number.
Shoppers see a Message us button on their order page.
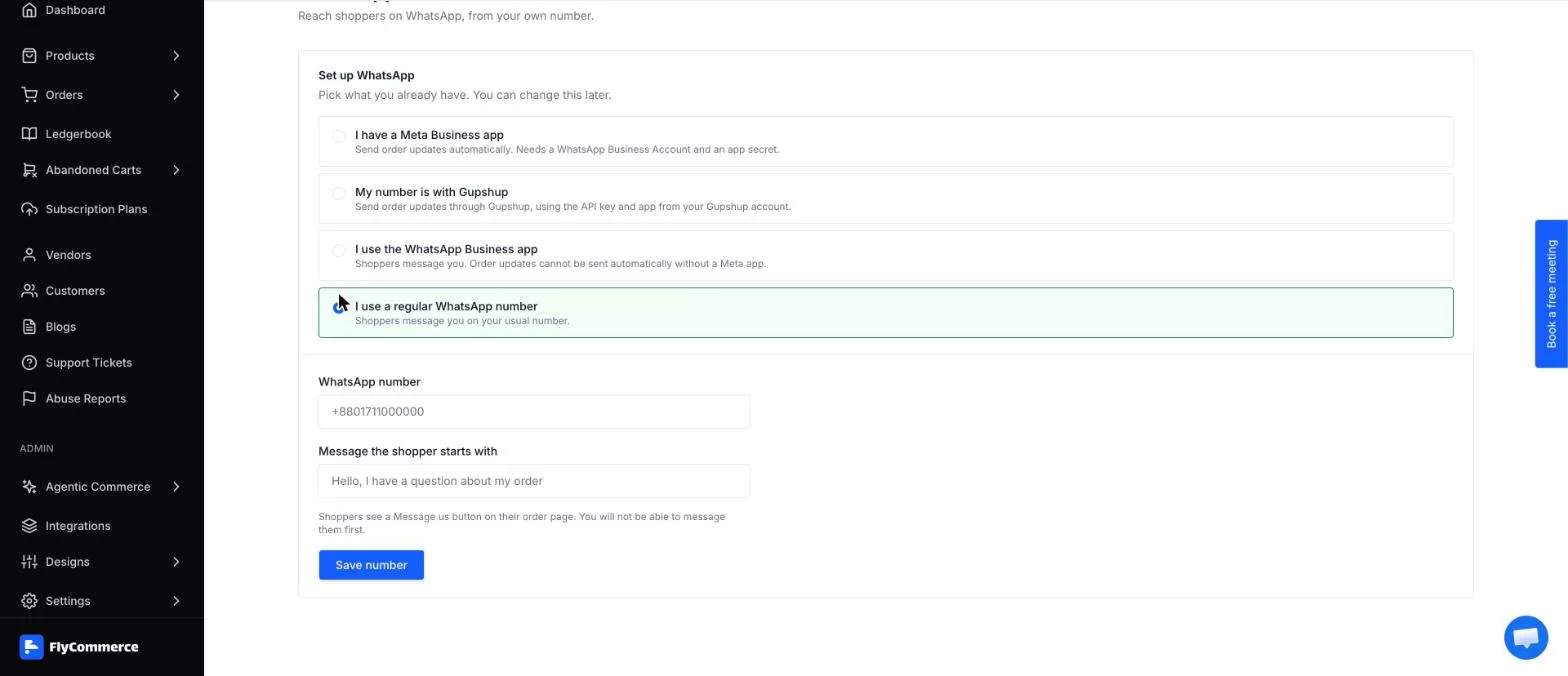
The regular number option asks for your WhatsApp number and the starter message for shoppers.
Set up Live Chat
Section titled “Set up Live Chat”Live Chat is a separate, lightweight option that lets vendors and customers chat over WhatsApp from your store.
- Go to Integrations and select Connect on the Live Chat card.
- Turn on Enable Live Chat. The toggle shows Enabled when it is on.
- Select the Whatsapp checkbox under Chat Provider.
- Turn on Chat On Vendor Page and Chat On Product Page to choose where the chat appears.
- Save your changes from the Live Chat Settings page.
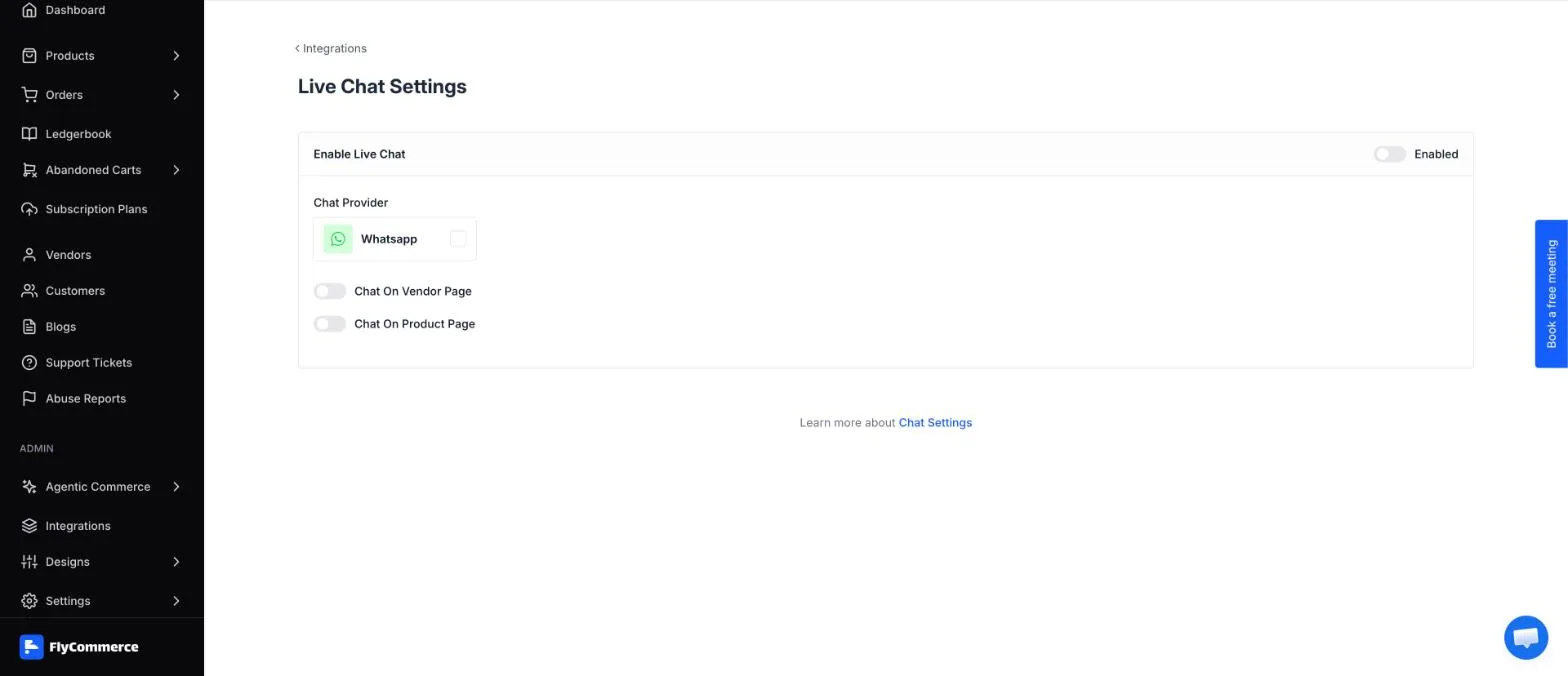
The Live Chat Settings page controls whether chat appears on vendor and product pages.
If the chat button doesn’t appear, check that the store and product page templates include the chat widget in the page builder. The Page builder overview explains how to edit these templates.