Migrate from WooCommerce or Dokan
FlyCommerce includes two migration tools. Use the Store Migrator to move a WooCommerce store into a FlyCommerce shop store, or the Marketplace Migrator to move a Dokan multivendor marketplace into a FlyCommerce marketplace store. Both start from the Integrations page of your dashboard.
Migrate a WooCommerce store to a shop
Section titled “Migrate a WooCommerce store to a shop”Create WooCommerce REST API keys
Section titled “Create WooCommerce REST API keys”- In your WordPress admin, go to WooCommerce → Settings → Advanced → REST API.
- Select Add key. Enter a name for the key and choose the Read permission.
- Select Generate API key, then copy the Consumer key and Consumer secret before you leave the page.
Start the Store Migrator
Section titled “Start the Store Migrator”- Sign in to your FlyCommerce shop store dashboard and open Integrations.
- Open the Store Migrator card.
- On the Store Migrator Settings page, select the WooCommerce source tile.
- Enter your Store URL, Consumer Key, and Consumer Secret.
- Select Start Migration.
Migration time depends on the size of your WooCommerce store.
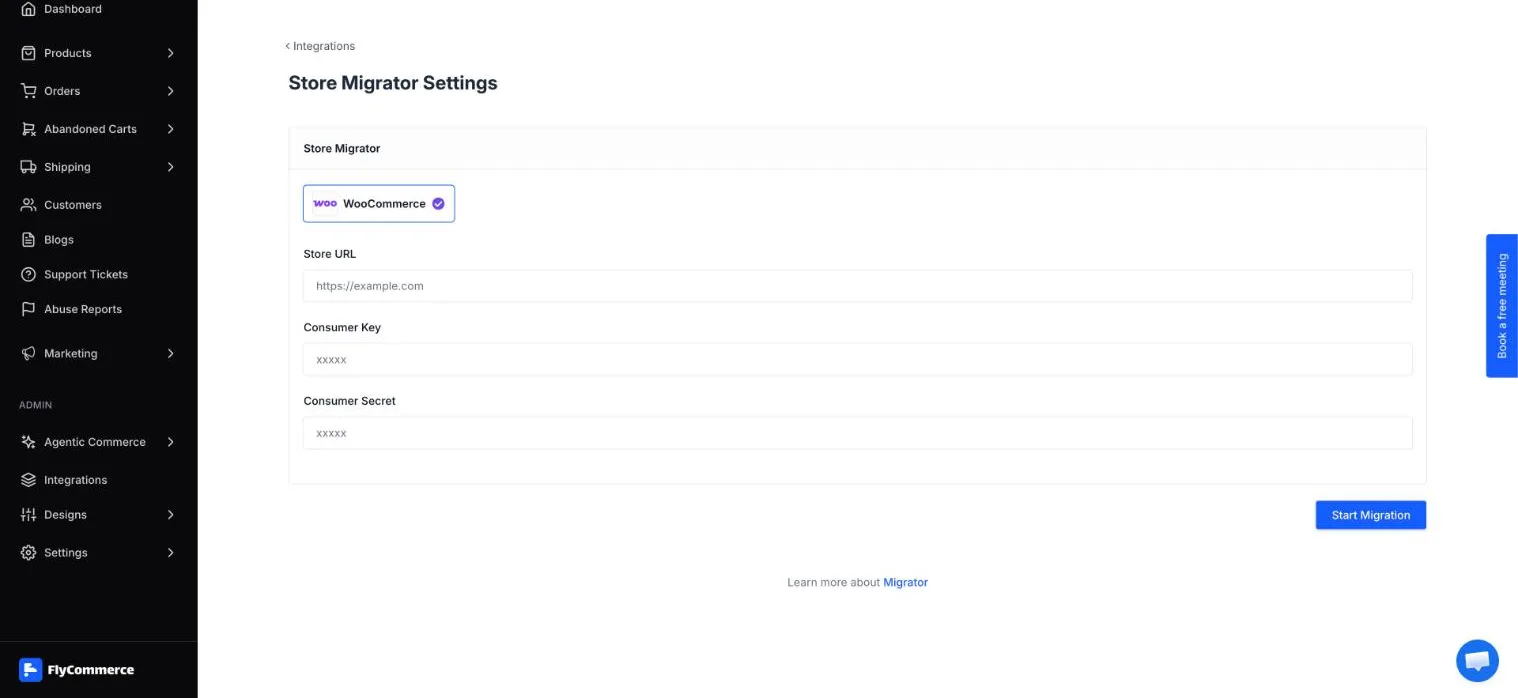
The Store Migrator Settings page takes your store URL and WooCommerce REST API keys.
Migrate a Dokan marketplace
Section titled “Migrate a Dokan marketplace”Create a WordPress application password
Section titled “Create a WordPress application password”- In your Dokan site’s WordPress admin, go to Users → Profile.
- Scroll to Application Passwords, enter a name for the new password, and select Add New Application Password.
- Copy the generated password. You need it in the next steps.
Start the Marketplace Migrator
Section titled “Start the Marketplace Migrator”- Sign in to your FlyCommerce marketplace dashboard and open Integrations.
- Select Get Started on the Marketplace Migrator card.
- On the Marketplace Migrator Settings page, select the Dokan source tile.
- Enter your Store URL, such as
https://example.com. Then enter your WordPress Username and the App Password you created. - Under Select a free subscription plan for imported vendors, choose the free plan that imported vendors will use.
- Select Start Migration.
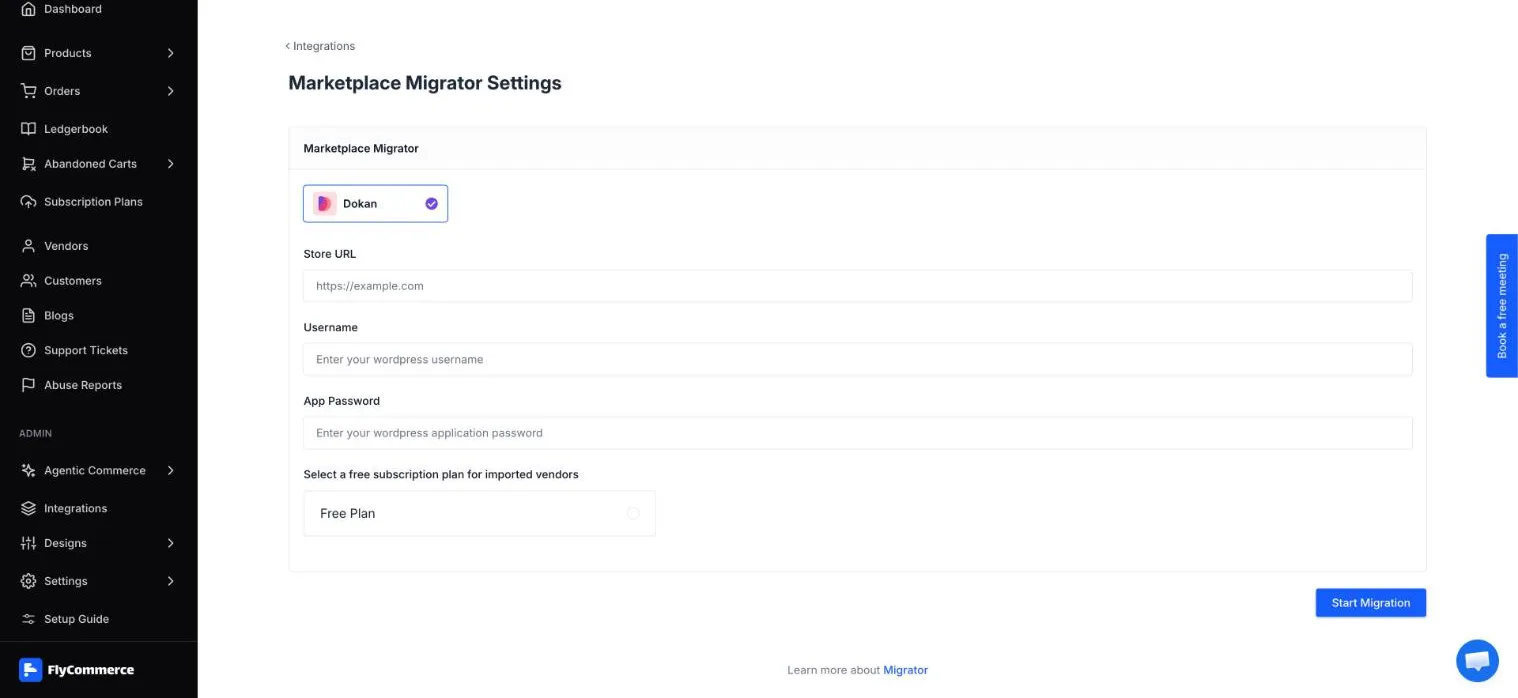
The Marketplace Migrator Settings page takes your Dokan site details and an application password.
Check the migrated data
Section titled “Check the migrated data”When the migration finishes, compare the new store with your source site. Check each type of data your store depends on:
- Products and categories: confirm the items, their names, and their category assignments.
- Vendors (marketplace only): confirm each vendor’s store details.
- Customers: confirm the customer records you need to keep.
- Orders: confirm the orders against the source site.
This guide does not list every data type each migrator imports, so check any other data your store relies on. Keep the source site running until every item is checked. If something is missing or incorrect, report it with the Support Tickets section of the admin sidebar.