Set up the wishlist feature
A wishlist lets customers save products they like for later. Store owners add the Add to Wishlist block to the Single Product template in the page builder, and customers save items to a wishlist in their customer account.
Add the wishlist button to the product page
Section titled “Add the wishlist button to the product page”The Single Product template controls how every product page looks, so make the change in the template and then check a real product page.
- Go to Designs → Themes, then click Customize on your current theme.
- Select the Single Product template. Use the preview to see the layout, then click Edit to open the editor.
- In the INSERT panel, find Add to Wishlist under Template blocks. Drag it to where you want the button to appear, such as near the Add to Cart block.
- Click Save.
- Open a product on your storefront and confirm that the wishlist button appears where you placed it.
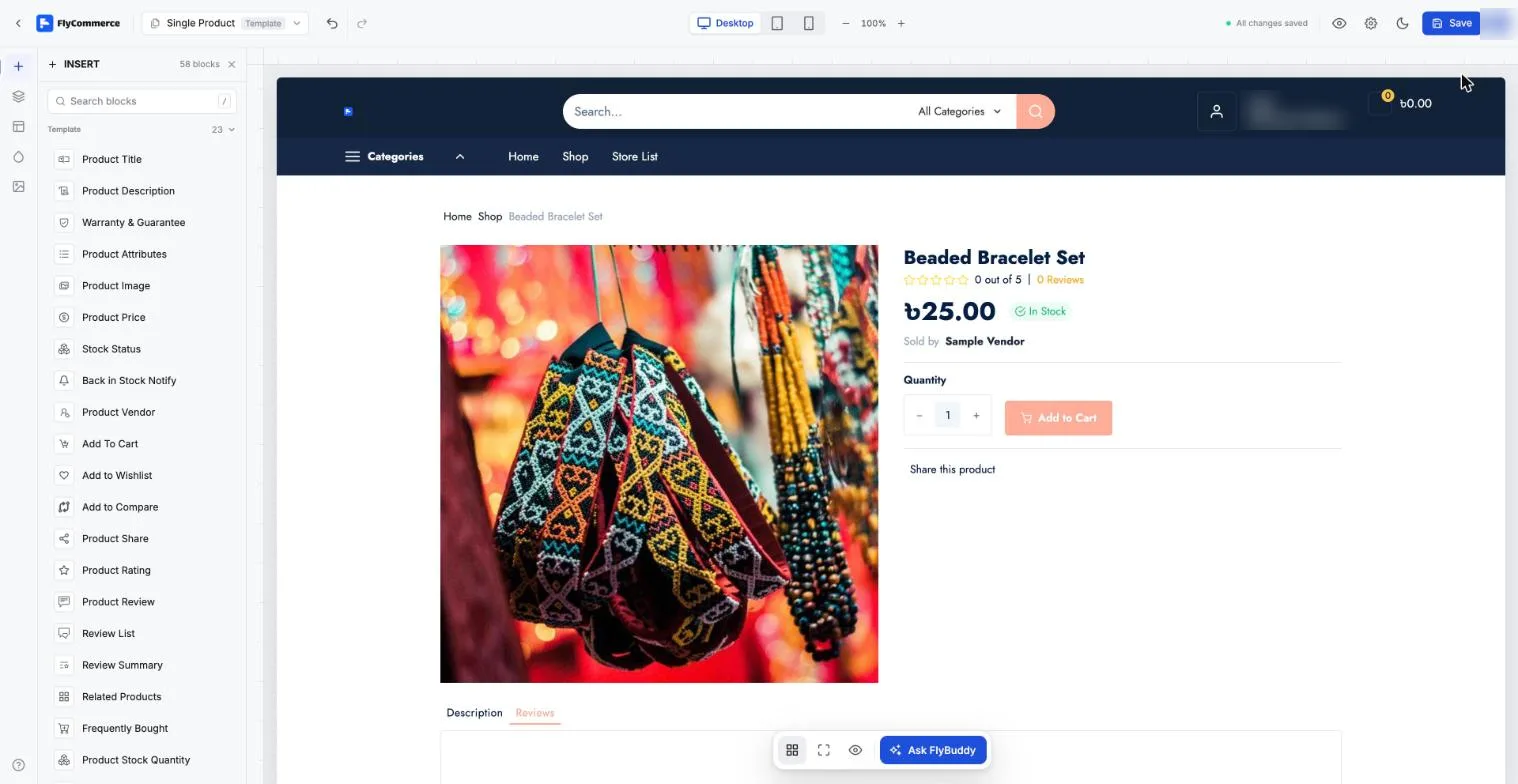
The Single Product template editor, where you add the Add to Wishlist block.
Add a wishlist link to the header
Section titled “Add a wishlist link to the header”If you want a wishlist entry point in your header, use the Wishlist block from the Site group.
- Go to Designs → Themes, click Customize on your current theme, then open the Header template part.
- In the INSERT panel, open the Site group and drag Wishlist to where you want it.
- Click Save.
How customers use the wishlist
Section titled “How customers use the wishlist”Customers see the wishlist button on the product page. Clicking it adds the product to their wishlist in their customer account.
- Open a product page and click the wishlist button. If the product has variations, the customer must select a variation first.
- To save the product to a custom list, open the dropdown on the wishlist button and choose the option to create a new list. Give the list a name and create it.
- Open the list in the customer account to view saved products.
- Use Move to Cart to move a saved product directly to the cart.