SEO Settings
Use SEO settings to describe your storefront in search results and control the information shown when a page is shared. Changes can affect how people find your store, so review the storefront after saving.
Before you start
Section titled “Before you start”Have a concise store title, an accurate description of your business, and a social-sharing image ready. Sign in with a role that can edit store settings.
Set your store title and description
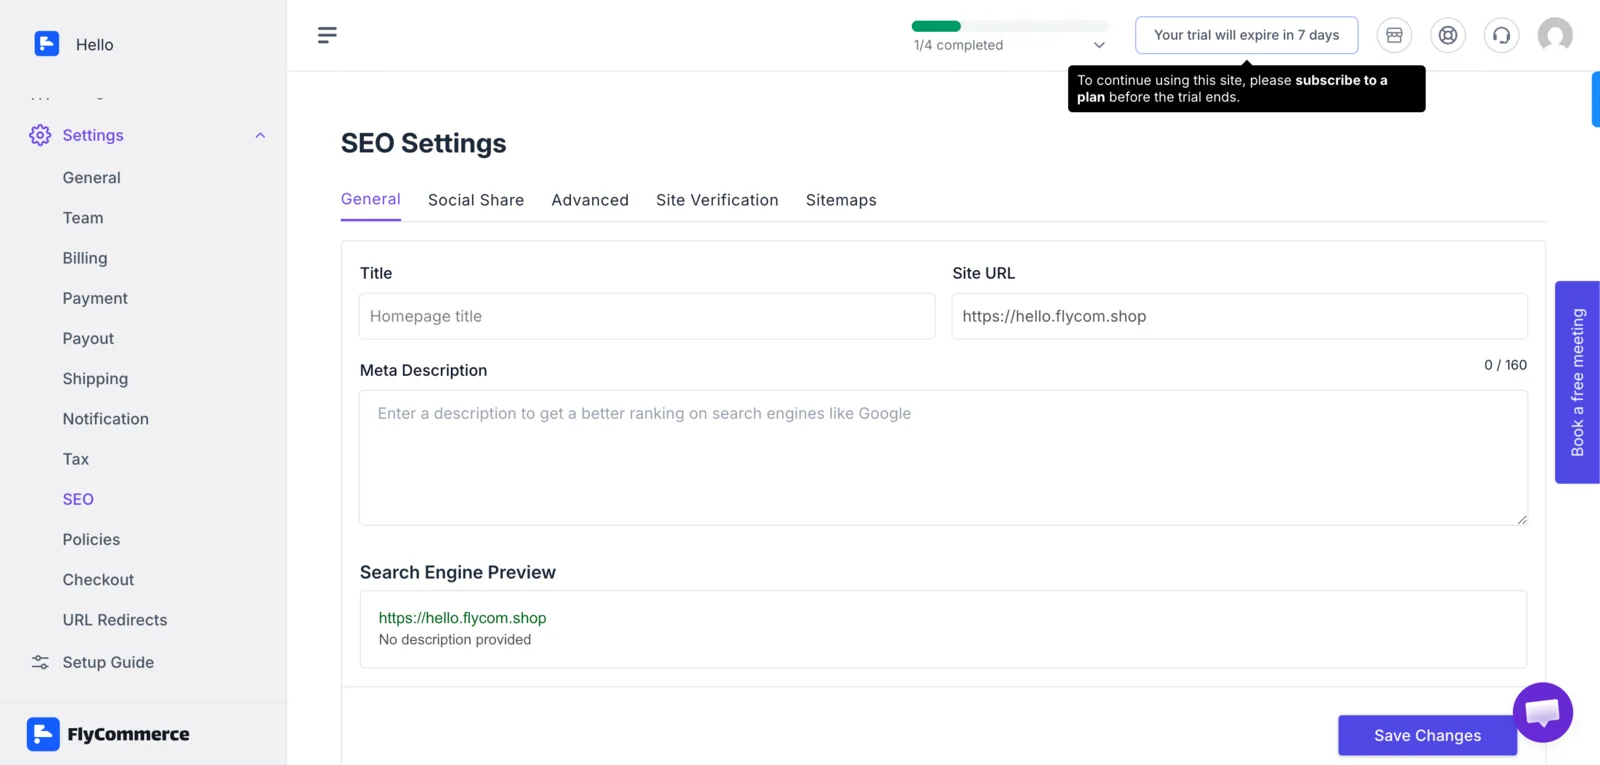
Section titled “Set your store title and description”- In the dashboard, open Settings and select SEO.
- On the General tab, enter the title for your storefront.
- Check the Site URL and confirm it matches the public address customers use.
- Enter a concise Meta Description that accurately describes your store.
- Review the search-engine preview and select Save Changes.
Set the social-sharing preview
Section titled “Set the social-sharing preview”- Open Settings → SEO → Social Share.
- Add the title and description you want to appear when someone shares your storefront.
- Choose an image that represents your brand and check the preview.
- Select Save Changes.
Review advanced search settings
Section titled “Review advanced search settings”Open the Advanced tab and read each setting before changing it. In particular, use noindex only when you intend to keep a page out of search results. If the dashboard shows crawler or sitemap controls for your account, follow the explanation beside each setting and save only after checking its effect.
Important: A
noindexsetting can remove a page from search results. Do not enable it for your public storefront unless that is intentional.
Verify your changes
Section titled “Verify your changes”- Open your public storefront in a private browser window.
- Check the page title and description in the browser or page source.
- Share the store URL in a preview tool or messaging app and confirm the image and text.
- Open the Sitemaps tab and follow the sitemap link shown there. Confirm it loads before submitting it to a search engine.